|
Configuring Project and Folder Settings |


|
Project Settings
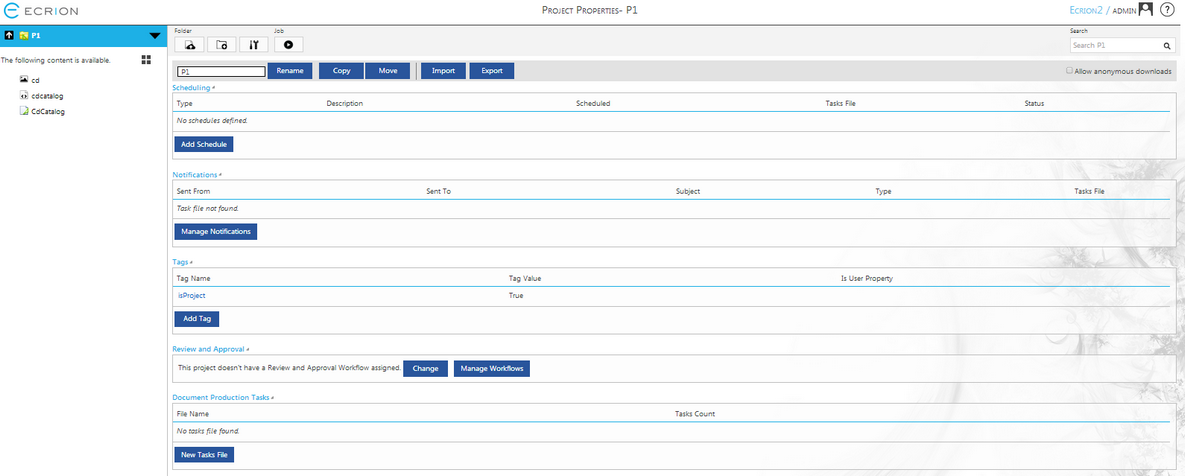
Once you've created a Project in the Ecrion Omni System, you will want to configure necessary settings such as scheduling or designing the Workflow of your project. This section will assist you in configuring the necessary settings in your project to be able to accomplish successful project runs. To access the options available to you below, select the Project from the Module Selection Menu in the Side Menu. Select the Settings button from Toolbar.
Details window settings
There are various settings that can be set from the Details window section of the page:
Add Schedule - Easily set up your project to run on a schedule.
Manage Production Tasks - Set up, step by step, the tasks that will determine the workflow of your project.
Manage Notifications - Configure Ecrion Omni System to notify you upon successful completion or failure of any project run.
Assign Review and Approval Workflows - Assign a previously designed workflow for review and approval processes.
Add Tags - Easily add tags to your project.

Figure 1: The settings options available in the Project settings page.
Folder Settings
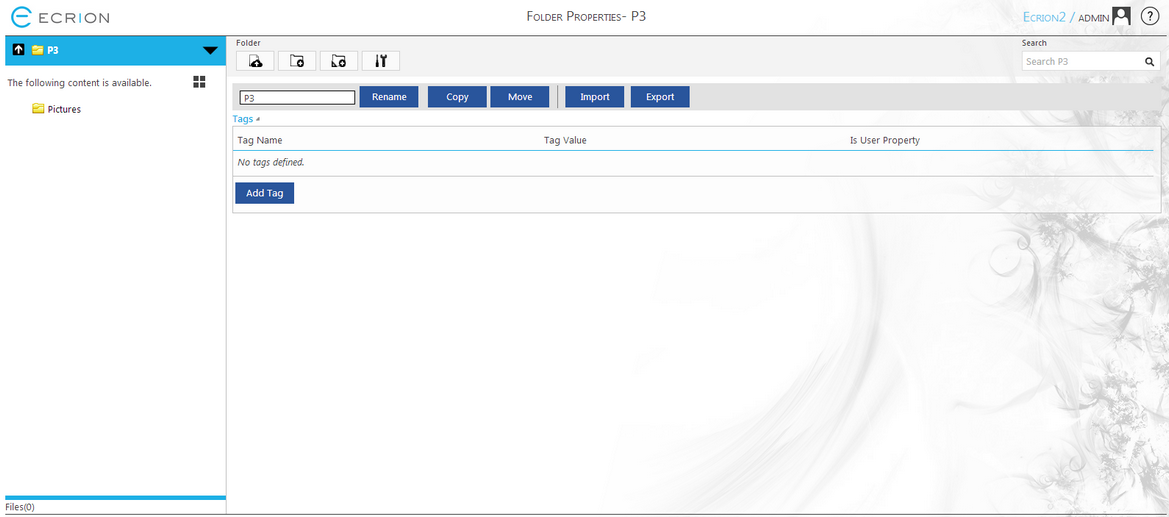
To access the available settings for folders, select the desired Folder from the Module Selection Menu in the Side Menu. Select the Settings button from Toolbar.
Details window settings
The Details Window for the folder's settings unlike project's settings, provides only one property :
Add Tags - Allows you easily add tags to your folder.

Figure 2: The settings options available in the Folder settings page.
As it can be seen in Figure 1 and Figure 2, there are multiple options available in the toolbar NOTE: The options from the toolbar are available both for Projects and Folders
Toolbar settings
| • | Rename - You can use this option to modify the name of the Project. |

Figure 3: The Rename window.
| • | Copy - This option allows you to copy the Project and all its content elsewhere in the Environment. NOTE: A Project cannot be copied in another Project. |

Figure 4: The Copy page.
From the Select Path drop down list you have to choose the location where you the Project will be copied.
| • | Move - Same as the Copy option, the Move option copies the Project elsewhere in the Environment, but the Project will be deleted from its original location. Note: A Project cannot be moved in another Project. |

Figure 5: The Move page.
From the Select Path drop down list you have to choose the location where you want to move the Project.
| • | Import - This option allows you to import a .zip archive from your computer. The files from the archive will be unzipped into your project. Only .zip files can be imported. |

Figure 6: The Import page.
Select the Choose File button in order to browse for the desired .zip archive.
| • | Export - Selecting this option will download the entire Project into your computer as a .zip archive. |