|
Field |


|
|
Field |
|
As you design your Document Template, you will most likely find that Fields are the most commonly inserted item you will use. Fields are used in tables, paragraphs, and even in side regions with the primary purpose to display content taken directly from a location in your data source. These Fields will be used in when you will want the actual resulting document to reflect exactly what is located in the data source and not just a static value that you have typed in the Document Template.
Fields will show up in the Design Surface by default with a gray background and an XPath expression (the location of the information in your data source). You can resize these elements in the Design Surface for your design needs, but in your output document this Field will be replaced with the value from your data no matter what the length. You should keep Dynamic behaviors such as this in mind when working with Fields.
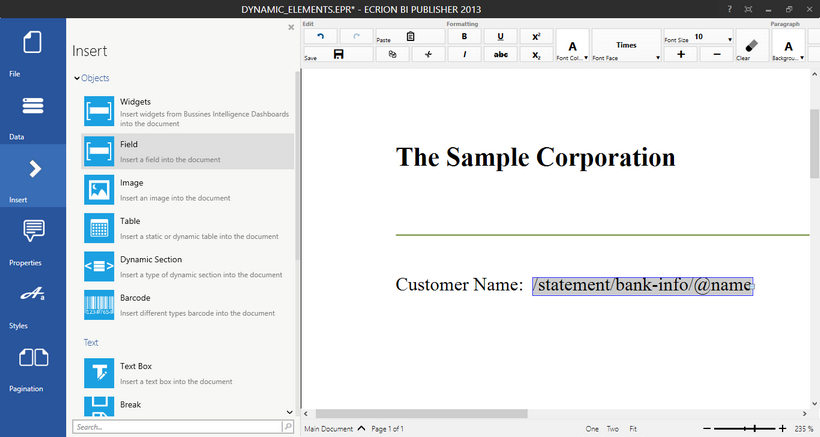
Figure 1: A Field is inserted in a document template as shown in the Design Surface.
An Introduction to How Fields Work
You can very easily add Fields into your Document Template, but before you begin with learning about the usage of these objects, we wanted to provide you with some helpful information on how these Fields actually find the specific data in your data source. The Publisher and BI Server actually will use the address associated with any Field in your template to gather the data and populate your document. The address a Field is using is actually called XPath. At the very simplest level, XPath is used during the transformation process as the defining address of where your data will come from.
As you can see from Figure 1 above, the XPath expression for this Field is "/statement/bank-info/@name". While you may not need to know how to write these expressions on your own, it is important for you to understand that when you insert a Field into your Document Template, the Publisher will automatically generate this address based upon your selection. When your document is generated, the value that resides at that address in your data will be used.
Usage
There are two primary options used for inserting Fields into your Document Template. Below we have highlighted both options for your reference.
Using the Insert Dialog
To insert a Field into your Document Template using the Insert Dialog, you will first need to select Insert in the Side Menu and select Field. Once you have selected Field, the Publisher will launch a commonly used tool called the Edit Expression Dialog. This dialog will allow you to select a Field from your data source, allow you to preview the value that is present, and even write your own Expression using built-in functions. You can learn more about using this dialog to select your Field by visiting the help section on the Edit Expression Dialog. Below you can see the Edit Expression Dialog at work in selecting a field. You can notice how the field is simply selected and you can review the value present in your sample data source.
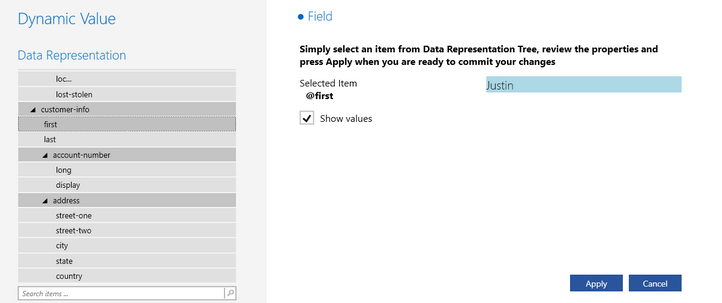
Figure 2: The Edit Expression Dialog allows easy selection of fields.
Once you have reviewed your field, you can select Apply to complete to insert your Field into the Design Surface.
Using the Data Dialog
Another way that you can insert a Field into your Document Template is to simply use the Data Dialog. You will need to select Data from the Side Menu to launch the Data Dialog. In this dialog, you will be able to view your data source and expand fields to find the exact data point you would like to use for your Field.
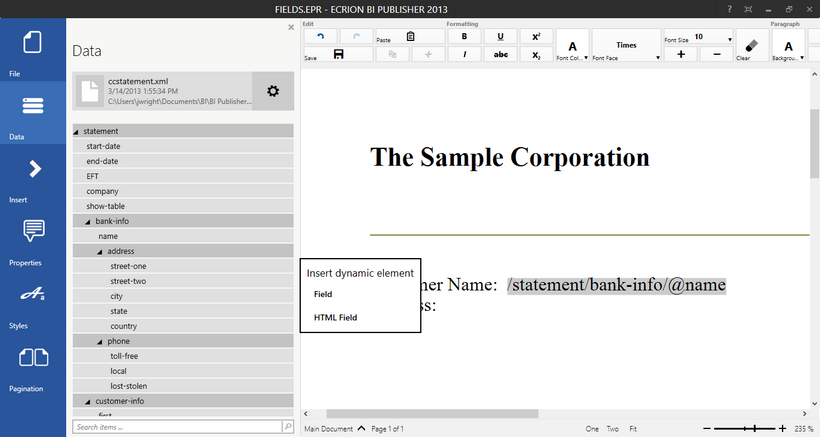
Figure 3: The Data Dialog can insert fields directly into your document template by selecting the field.
Once you have found the field you would like to insert, simply select that item and choose Field from the Insert dynamic element option menu. Upon selection, you will notice that the Field is inserted into your Document Template. You can now resize and format as you wish.
Formatting and Other Options
Now that you've inserted your Field, you should be aware that this element an be formatted just like text. You can select the Field in the Design Surface and access a variety of formatting options available to you in the Toolbar. Additionally, you can learn more about specific options related to Fields by reading the help section on Field Properties and how to format Fields in the Formatting help section.
As an additional reminder, you can always resize these Fields in the Design Surface, but the space consumed when generating your document will be dependent upon the value that resides in your data source.