|
Edit Expression Dialog |


|
|
Edit Expression Dialog |
|
The Edit Expression Dialog is designed to give you a simple way of selecting data from your data source and building expressions. This helpful dialog will allow you select a field, preview the value, and create your own Expression to perform operations like finding substrings, concatenating, summing, counting, and more. You will need to understand how to use this dialog to assist you in working with your data and including in your Document Template.
You will notice in Figure 1 that three main areas of the Edit Expression Dialog. The Data Representation Tree will always be visible for you to select the field that you would like to work with. The Field window will highlight the data item you have selected, and if you wish, will display the value that is present in your data source. You should be aware that you will need to use horizontal scrolling to navigate from the Field to the Expression window. The Expression window will allow you to use built in functions to perform operations on fields in your data source. Below you can find useful information on the usage of all three of these components.
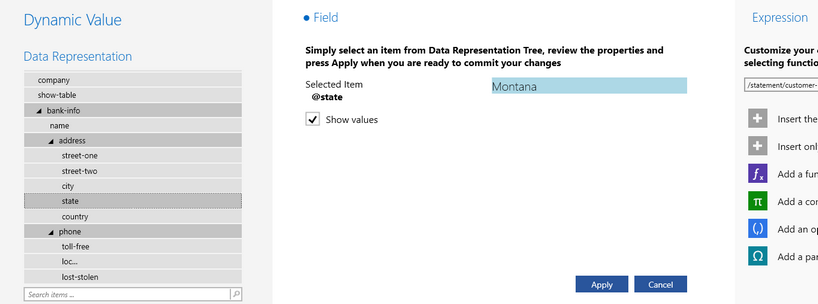
Figure 1: The Edit Expression Dialog provides easy access for including data.
Usage
To use the Edit Expression Dialog you will need to consider the following options below. These options reflect the primary usage of the Edit Expression Dialog to either select a field for insertion or create your own expression using the Expression window. We have four primary sections to assist you in using the dialog to meet your needs:
Example 1: Using Functions With Your Data
Example 2: Creating a Condition
This usage is often needed for situations such as inserting a field or selecting a field for a dynamic element like repeating table rows. You will notice that your data source will be displayed in the Data Representation Tree. You can expand and collapse elements in your data source to search for content accordingly or you can use the search option at the bottom of the window to simply search for the field you are looking for.
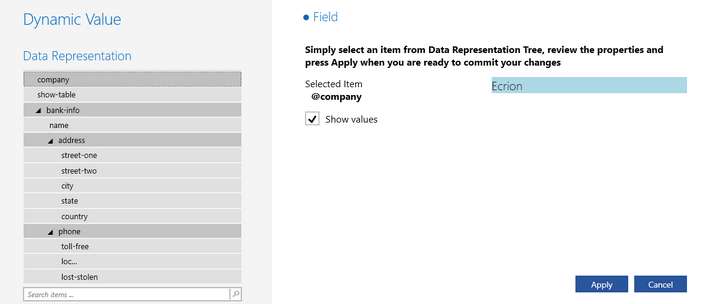
Figure 2: The company field is selected and the value is displayed in the Field window.
In some cases, because of the nature of your data item, no value is displayed. In Figure 2, the address field contains multiple attributes. This is an element which can contain text. The related attributes will contain values describing this element. Such values will be displayed in the Field Window.
If you are selecting a repeating element for a dynamic table row, this is a good example of simply selecting the element of your choice, and then selecting Apply to return to the dialog you were previously working in.
If you are selecting a simple element or attribute to add as a Field in your Document Template, you can select the item in the Data Representation Tree, and then in the Field Window preview your value to ensure this is the correct item you wish to insert. Once you are satisfied, select Apply to save your changes and return to the previous dialog.
In some situations, you might be using the Edit Expression Dialog to perform functions on your data such as summing or concatenating two fields. Or, perhaps you need to specify a condition for which a formatting property will be displayed. You can create your expression in the Expression Window. Below, you can find a list of each available option to you and useful information on when these are used to build an expression.
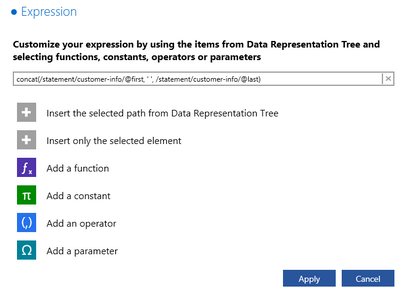
Figure 3: The expression window provides available options for building an expression.
Insert the selected path from the Data Representation Tree - this option is useful for adding the entire path of the data item you have chosen. This is the option that we have used to build our expression in Figure 3. Select the item in the Data Representation Tree and select this option. You will notice that the entire path will be included in the expression field above.
Insert only the selected element - this option is useful if you do not need to include the entire path of the element. An example of this would be if you are inserting content into a repeating section and simply need to use only the selected item and not the entire path. Select the item in the Data Representation Tree and select this option. You will notice that the only the selected item will be included in the expression field above.
Add a function - this option allows you to choose from a variety of different built-in functions. You can select this option and a separate menu window will be displayed for you to scroll and select the function you would like to work with. Once you have made a selection, notice that the function will be added into the expression field so you can then add the items to replace the sample arguments with your data items. These sample arguments are placed there to tell you what type of items you can use with that particular function.
Add a constant - this option will allow you to add a constant to your expression. You can choose from a menu of constant options by selecting this option.
Add an operator - operators are used to build expressions indicating an action such as addition, subtraction, comparison, logical and or, and much more. An example usage would be if one item is greater than another. You would need to select this option and choose '>' from the available menu to build your expression.
Add a parameter - parameters are dynamic sources that can vary at render time that may not come from your data source. You can select this option to choose from a list of available parameters. An example of this usage would be using the local machines date and time to include in your document output.
Example 1: Using Functions With Your Data
Sometimes you will want to choose from a list of built in functions to use with your data. Let's take a basic example of concatenating two values from our data source. In this example we will use the first and last name fields to create a full name. The first step will be to use horizontal scrolling to view the Expression Window.
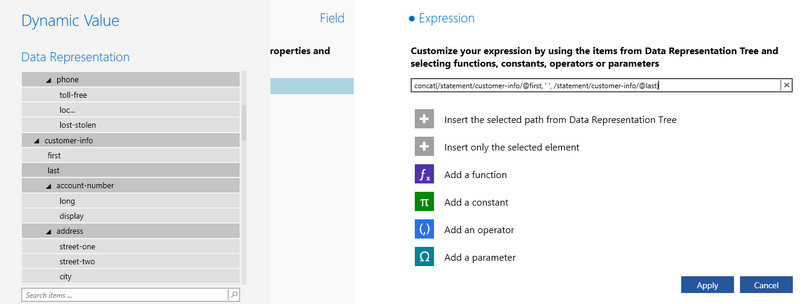
Figure 4: The Expression Window is used to build a concatenation of two data items and the space character.
Our first step will be to add the function that we need: the concatenate function. Here we have selected the Add a function option and selected the concatenation function available for string values (concat) available from the resulting menu. Notice how the function is added in the expression field.
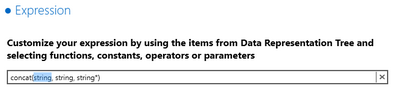
Figure 5: The concatenate function is added into the expression field.
The next step is to replace the placeholder arguments with our actual data items that we wish to replace. This is the step where you can select an item in the Data Representation Tree and then select from the insert options (path or just element) to add the item into your expression. In this example, we have replaced the first string with the path for a first name, the second string with the space character, and the third string with the last name. This was done by selecting the insert selected path option and manually adding the space character for the second argument. Now we have created an expression that will concatenate all three string values to create a full name.
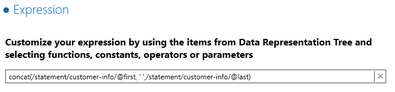
Figure 6: The completed expression as seen in the expression field.
Now that we have successfully built an expression, we can select Apply. This will complete our use of a function example and we can choose to preview our output to view the result of this function.
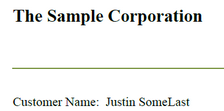
Figure 7: The output combines both first and last names to provide a full name.
Example 2: Creating a Condition
You may also find the need to create a condition for a conditional section or even when applying conditional formatting using Dynamic Properties. An example of this usage would be if you wanted to change the font color of a field to green if the name is a specific value. In this step, you will need to build the expression that states when the data item is equal to the target value. To do so, you will need to build your expression using the available options in the Expression Window.
The first step in this example is to select the data item from the Data Representation Tree. Here we have selected the first the first name item from our data source, and then selected to insert the selected path to add to the expression field. You can notice that after this step, the data item path will be visible.
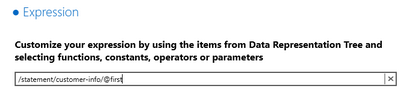
Figure 8: The Data Item path is selected and inserted into the expression field.
Our next step is to add an operator. Our operator for this example will be the '=' option. You can select the Add an operator option to then find the '=' operator to add to your expression. You should note that you can also manually enter this into the expression field.
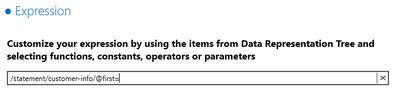
Figure 9: The '=' operator is added to the expression.
The final step is add the value that we are testing for in our condition. In this step we will manually enter in 'Richard'. You should be aware that you will need to use apostrophes to denote your values in the expression field.
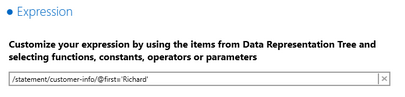
Figure 10: The value being tested for is added to the expression.
Once you have completed setting up your expression, you can select apply. The use of this condition will by related to a Dynamic Property to format a field so you would be returned to that dialog. In this case, a green font color would be used for whenever the first name value equals "Richard".