|
Formatting |


|
|
Formatting |
|
The Formatting dialog is used for applying formatting to your inserted Fields. This feature is often useful for taking values in your data source and formatting them to be displayed as currency, numbers, dates, times, and even custom formats that you can design. This section is designed to assist you in the usage of the Formatting Dialog.
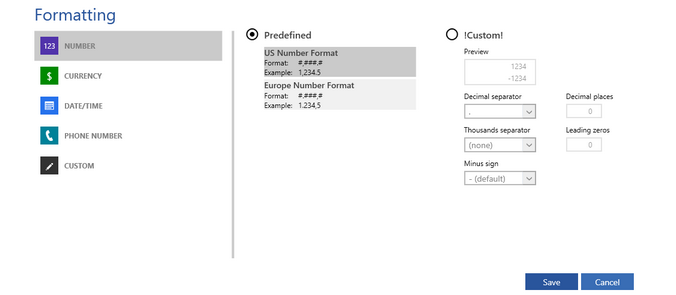
Figure 1: The Formatting dialog shows available formatting options for Fields.
Usage
You can access the Formatting Dialog from the Properties Dialog of any field by selecting the Format button. Here you will simply need to first select the type of formatting you would like apply to your Field first.
You will next have an option to choose from a list of predefined options or select Custom to configure a format of your own. Let's investigate a sample where we would like to format a Field to be a currency with two decimal places. You will need to select currency as the Formatting Type first. Next you will need to select the Custom button and change the options to format using the currency of your choice and add the value 2 in the Decimal places field. You should notice that you will be able to view your changes in the Preview window.
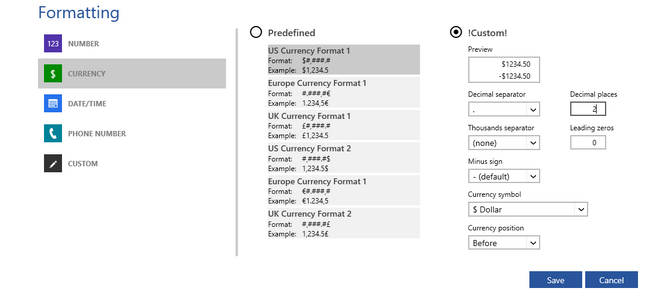
Figure 2: Formatting is configured to display a field as a currency.
When you are satisfied with your formatting configuration for your Field, select Save to return to the Properties Dialog for your Field.
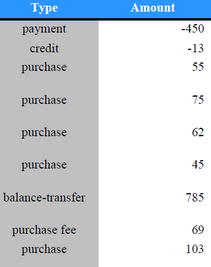
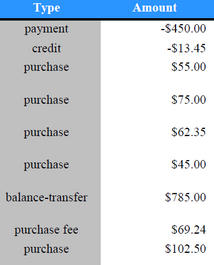
We can preview the results of applying this formatting to ensure the results are satisfactory.
Figure 3: The amount field displayed before formatting. |
Figure 4: The amount field displayed with formatting applied. |