|
Other Post Installation Steps |


|
After a successful installation using the Ecrion Omni System installer, you will need to follow these additional steps to ensure your machine is configured properly.
1. Port Configuration in Firewall
2. Repository Web Service Test
3. Document Production Web Service Test
4. Setting Ecrion Omni System Web Service Bindings
5. 404 Error Troubleshooting (if applicable)
6. SMTP Settings Configuration
1. Port Configuration in Firewall
Ensure that you have opened port 8091 (or the port you have specified during installation) in the firewall. For example, to enable port 8091 (the default port used during installation), open Windows Firewall with Advanced Security. You will need to select New Rule under Inbound Rules and configure appropriately. Give your rule a name such as Ecrion Omni System 8091 port. It will appear as follows. Double click your new rule to access the Properties for reference.
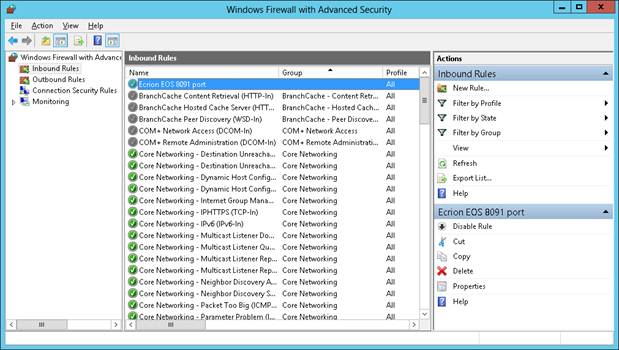
Figure 1: The default port (8091) is opened in Windows Firewall settings by creating a New Rule.
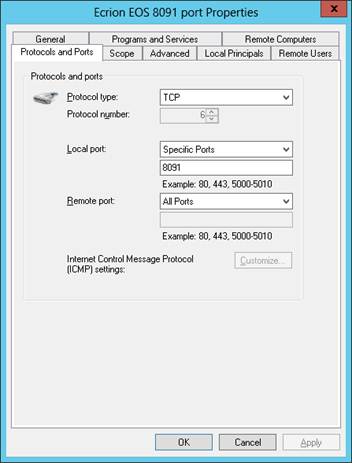
Figure 2: Port Properties for Ecrion Omni System 8091 New Rule.
2. Repository Web Service Test
To test if the Ecrion Omni System Repository Web Service is available, go to http://localhost:8091/REPWS/Ecrion.Repository.WebService.RepositoryWebService.svc (if 404 error received, see step 5).
3. Document Production Web Service Test
To test if the Ecrion Omni System Document Production Manager Web Service is available, go to http://localhost:8091/EOSWS/Ecrion.EOS.WebService.DPMWebService.svc (if 404 error received, see step 5).
4. Setting Ecrion Omni System Web Service Bindings
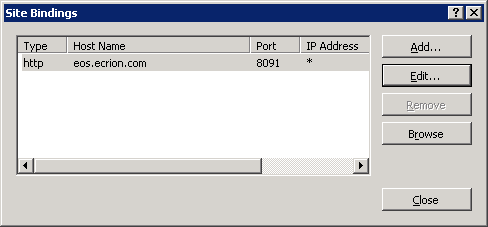
In order to have the correct bindings for the external usage of Ecrion Omni System web services, you must follow these steps after installation. You will need add the host name in IIS for the Ecrion Omni System web site:
1. Open IIS Manager.
2. In the Connections pane, expand the "Sites" node in the tree, and then select Ecrion Omni System site.
3. In the Actions pane, click "Bindings".
4. In the Site Bindings dialog box, select the binding for the selected Ecrion Omni System port to add the host name and then click Edit.
5. In the Host name box, type a host name for the site, such as www.contoso.com or marketing.contoso.com.
6. Click OK.
While accessing the web services above, you may get a 404 error that look like this:
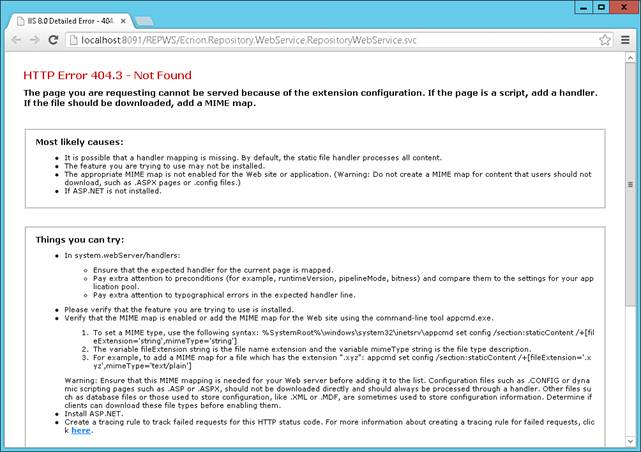
Figure 3: Specific 404 error in web service testing.
If this happens, the following Windows feature should be installed. Note that this feature is needed only if accessing Ecrion Omni System using the Web Services interface (for example from Ecrion BI Studio) but it is not needed in order for Ecrion Omni System itself to function properly.
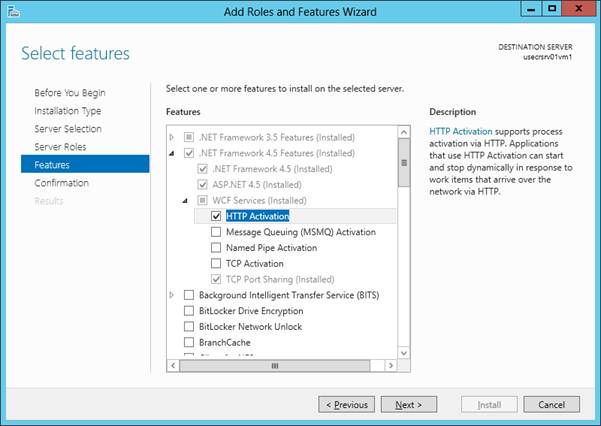
Figure 4: HTTP Activation is installed from Windows Features.
6. SMTP Configuration for Email Distribution
Before configuring Ecrion Omni System to distribute project files by email. You must first configure SMTP settings in the Ecrion Omni System Web.config file. The following steps can be used to accomplish this objective:
1. Navigate to C:\Program Files (x86)\Ecrion\Ecrion Omni System 20XX\Ecrion Omni System Website in Windows Explorer.
2. Open the file "Web.config".
3. Under <system.net> ensure the following element for mail settings is added:

Figure 5: Ensure that the <mailSettings> element is present in your Web.config file and customize attributes with your information.
4. You will need to specify the from email address, host, port, username, password, and SSL set to true or false.
5. Once you modified the mail settings with your configurations, save the Web.config file.
6. You test your configuration settings by including a Distribution Task in a test workflow.