|
Join |


|
|
Join |
|
The Join Command can be inserted into your Data Diagrams when you would like to join data from multiple data sources based upon a condition. In this section, you can find information on usage examples, inserting, and working with Join Comands in your Data Diagrams.
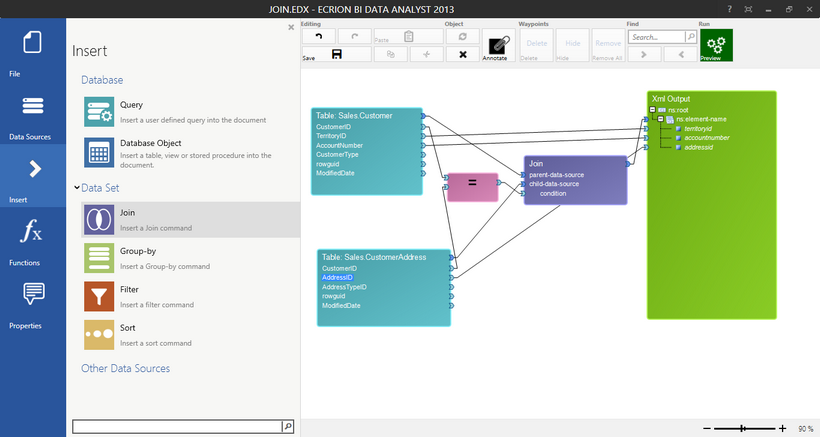
Figure 1: A Join object pairs data from two tables in the Design Surface.
When To Use a Join Function
An example of Join Command usage would be if customer data was stored in two separate tables in a database. One table holds information about the customer address information and another holds transactional history information. Both are contain an identifying field called ID.
Using a Join Command can allow the retrieval of the transactional data from the first table, and for each customer, also search the address table to compare ID's and when found, include the address information specified. This operation joins specified transactional and address information for each customer when the ID fields are equivalent.
Usage
In order to successfully use a Join Command, you will need to also add the Diagram Objects that this function relies on. To demonstrate adding a Join Command to join data from two different data sources, we will use the following example:
Scenario: We need to include data about our customers from two separate database tables. For every customer in our Sales.Customer table, we need to also include the addressID field which is located in a separate table called Sales.CustomerAddress. The condition that must be used is when the CustomerID in our child table is equal to the CustomerID in the parent table.
To appropriately set up such a Data Diagram, the following simple steps must be followed.
Insert Database Objects You Wish To Join
Let's start by adding the tables that are described in our example above. This step will require you to use the Insert Dialog to Insert a Database Object. In this example, we've added the two tables to join: Sales.Customer and Sales.CustomerAddress.
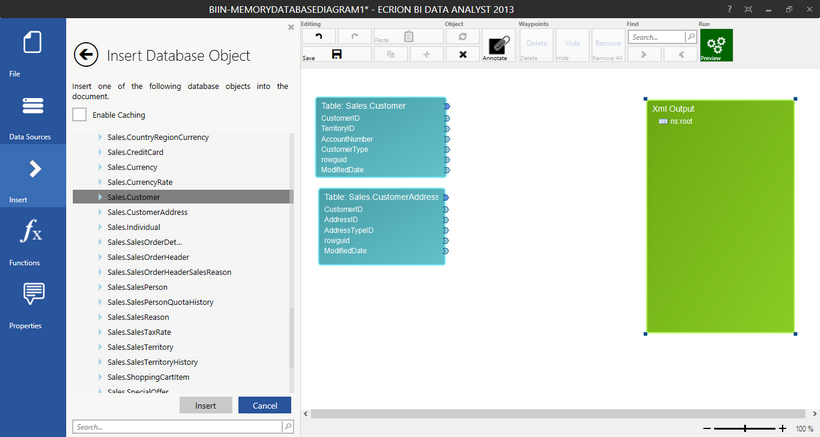
Figure 2: Database Objects are added to the Data Diagram.
Insert a Join Command
Using the Insert Dialog, select Join from the Data Set Objects group. Once selected, you will notice the Join Command is inserted into Data Diagram. Typically, this object is dragged and positioned in between the input sources and the output source. You should note that the Join Command contains, by default, a Parent Data Source and a Child Data Source. You can always add more Child Data Sources by right clicking on the Join Command to access the Application Bar. Additionally, there is a Condition input parameter that we must set up a function for.
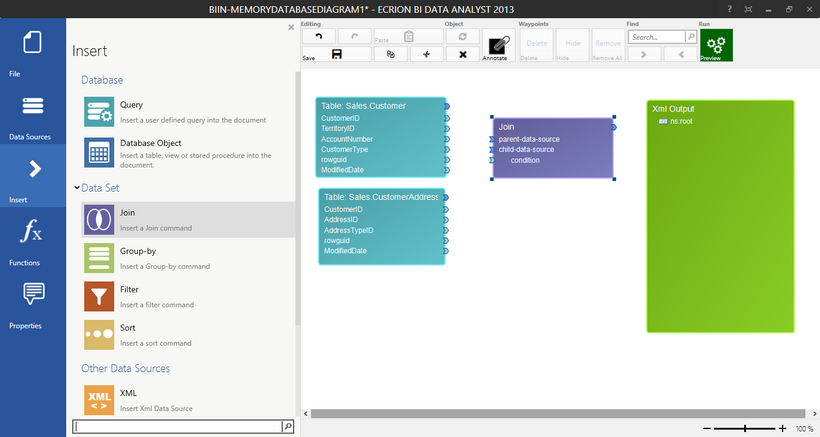
Figure 3: The Join Command is inserted and repositioned in the Data Diagram.
Set Up Your Condition
Our next step will be to include an appropriate Function to use. You can learn more about the available functions by visiting the help section on Inserting a Function. For this example, the Function we would like to use is the Logical function "Equal" to test when two input parameters are equal to one another. This must be chosen from the available functions in the Functions Dialog. Once inserted into the Data Diagram, we will reposition this function visually to allow us to connect to both input data sources and our Join Command.
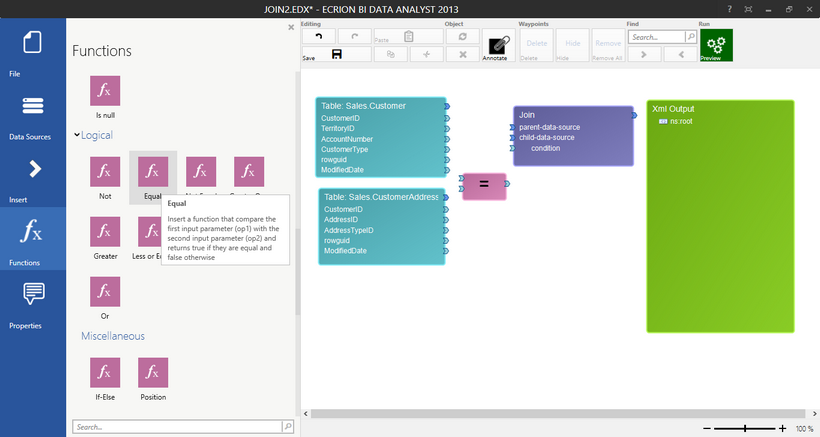
Figure 4: The Equal Function is inserted an repositioned in the Data Diagram.
Use Data Connections to Map Your Data Flow
Now that we have successfully added the appropriate Diagram Objects into our Data Diagram it is time to map our data accordingly. The following Data Connections are created to complete the setup of this Join Command.
| • | Connect Sale.Customer to parent-data-source. |
| • | Connect Sales.CustomerAddress to child-data-source. |
| • | Connect CustomerID from parent table to Equal Function. |
| • | Connect CustomerID from child table to Equal Function. |
| • | Connect Equal function output to Join Command condition. |
| • | Connect Join Command output to ns:root in output source. |
| • | Connect Account Number and Customer ID fields to new element sequence. |
| • | Connect Address ID field to new element sequence. |
The product of making these Data Connection connections will result in a Data Diagram looking like that in Figure 5 and yielding the joined data result as present in Figure 6.
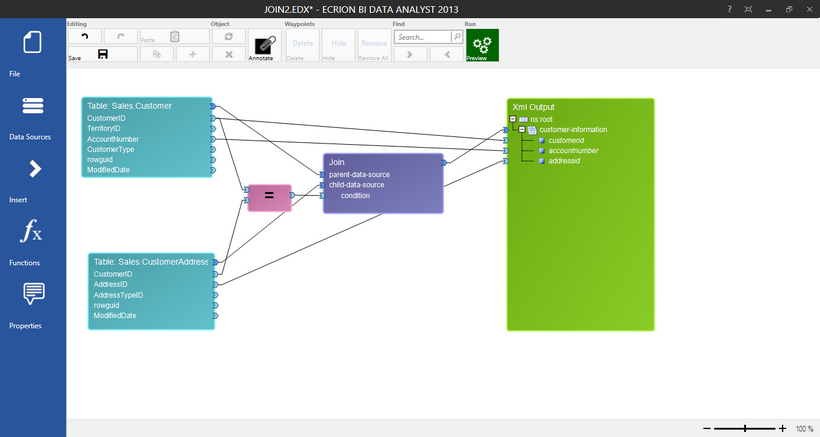
Figure 5: The completed Data Diagram with mapped data.
Results
It is always recommended that you preview the results of any Data Diagram once you have made adjustments. You can access the Preview button in the Toolbar to review your output. This Join Command will yield the following results. Figure 6 demonstrates that our Join Object has worked as intended combining data from both tables to meet our needs.
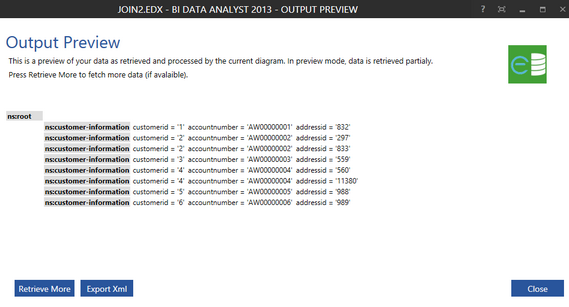
Figure 6: The Output View reveals the Join Command results are satisfactory.