|
Insert Query |


|
|
Insert Query |
|
A SQL Query can be used to customize the search, retrieval, and transformation of your data that resides in a relational database. A SQL query can be extremely useful if you understand the SQL language (Structured Query Language) but also if you have very complex rules that you must use for testing and retrieving your data. Although you can use the BI Data Analyst to visually design your Data Diagrams, this option to write your own SQL Queries is still provided to you. This section is designed to assist you in using this particular type of Diagram Object.
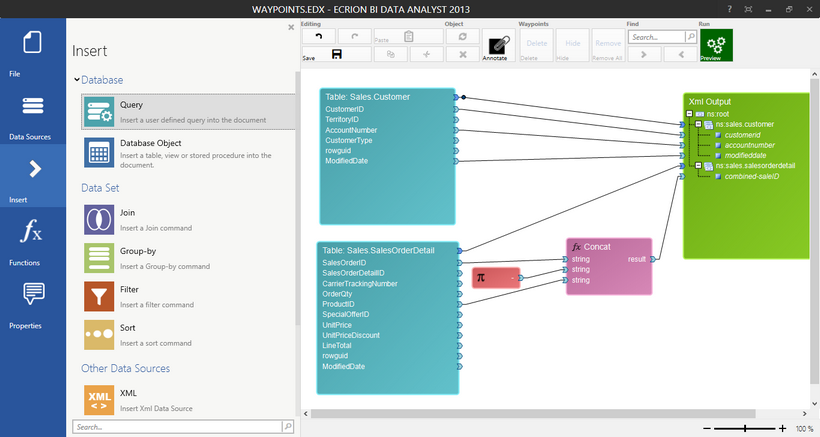
Figure 1: The Insert Dialog is used select a Query Object to insert.
Usage
In order to insert a Query into your Data Diagram, you will need to select Insert from the Side Menu. This will open the Insert Dialog where you will be able to find the Query option in the Database Menu. When you select this option, the Insert Query Dialog will then be displayed on the screen for you to begin writing your SQL Query.

Figure2: After selecting Query, the Insert Query dialog allows for query design.
Getting Started
First, you will need to select the specific Data Connection that this Query will rely on. Simply select from the drop down list of available connections in the Choose Connection Field to make this choice. For more on setting up your data connections, you can visit the Adding Data Connections section of the help documentation.
Next, you will need to specify a name for your query. You can type this information in manually in the provided field for Query Name.
You can choose to Enable Caching by selecting this checkbox. You may wish to use this option to improve performance. Such an adjustment will store query results in memory differently and often times reuse data that has not been changed.
Writing Your Query
You will now be able to proceed with writing your SQL Query in the provided field. Place your cursor in this window and begin typing your Query accordingly. Here, we will use a simple example to demonstrate such usage.
Scenario: Let's imagine a situation where we want to find all distinct sales from our Sales.SalesOrderDetail table where the Unit Price value was greater than one thousand dollars and also the special offer promotional code was set to 2.
If you are familiar with SQL, you can use the Query Field to write your own query to satisfy this need. Below we have listed this Query as well as provided an image demonstrating how this was used in the Query Field.
SQL Query: "select distinct UnitPrice, SpecialOfferID from Sales.SalesOrderDetail where UnitPrice>1000 and SpecialOfferID=2"
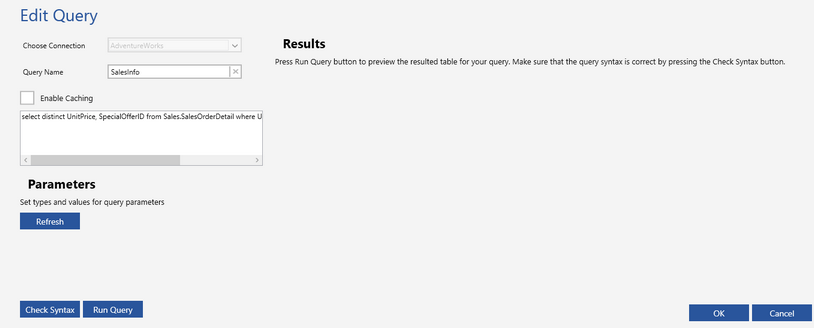
Figure 3: The Query Editing Dialog allows for inserting and editing SQL Queries.
Checking SQL Syntax
When you are writing your SQL Query, you will want to use the Check Syntax button to ensure that you have not made any errors. When you press this button, the BI Data Analyst will review your code and return an error message if you have incorrect syntax in your SQL Query. If your Query has no syntax errors, you will receive a Success message. To demonstrate this usage with incorrect syntax, we have deleted the space between distinct and UnitPrice field and selected the Check Syntax button. Below is the error message received.
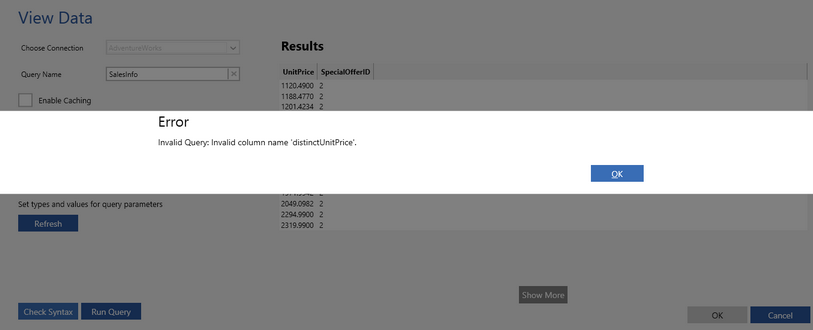
Figure 4: An error is thrown when using the Check Syntax button.
Running Your Query
Once you have checked your syntax, you will need to use the Run Query button to view the Results of your query. This will prove useful to ensure that your Query is returning the data that you had intended it to. To use this helpful feature, select Run Query, and you will notice that a subset of your entire data returned will be displayed in the Results Window on the right. Here you can check the returned values to ensure that your Query is pulling the data you had intended. In this example, you can notice that our query did, indeed, pull the UnitPrice values over 1000 and also only selected the SpecialOfferID with the value of 2.
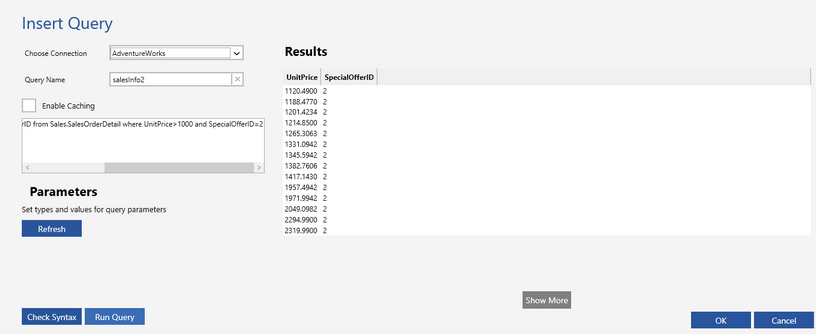
Figure 5: The Run Query button returns the data results of the Query.
You can view more of your returned data by selecting the Show More button.
Using Your SQL Query
Once you are satisfied with the results of your SQL Query, you can select OK to insert this Query into your Data Diagram. You will notice that the SQL Query will now be a Diagram Object in blue in the Design Surface. Here you can move, resize, and create Data Connections to connect your SQL generated data to your output source. For more information, see Adding and Working With Diagram Objects and Using Data Connections.
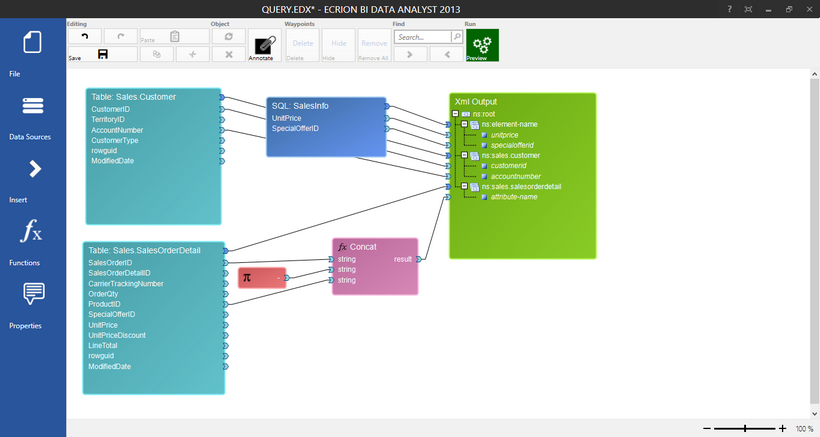
Figure 6: Data Connections are used to connect the SQL Query Object data to the Output XML.