|
Inserting a Subdocument |


|
|
Inserting a Subdocument |
|
To insert a previously designed Subdocument into your document template, follow the instructions provided below.
1. Place your cursor in the Design Surface where you would like to add the Subdocument.
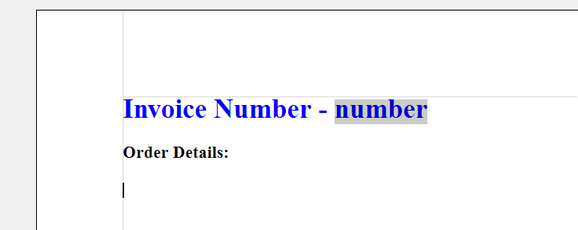
Figure 1: The cursor is placed in the Design Surface where the Subdocument will be added.
2. In the Insert Tab in the Ribbon, select the Subdocument button.
3. The Windows Open Dialog will launch and you will need to search for and select the Subdocument you would like to include. The Insert Subdocument Dialog will now be displayed. You will notice that your Subdocument content will be displayed in the preview window. You will have options to configure parameters as well as making this a global template. For more information, visit the Global Templates and Using Parameters in Subdocuments sections of the documentation.
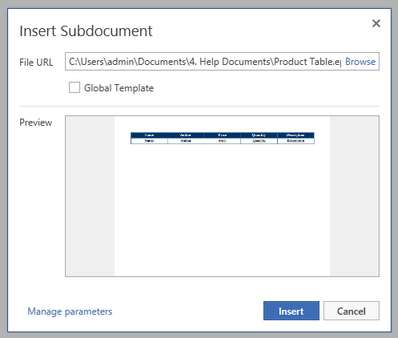
Figure 2: The Insert Subdocument Dialog allows for selection and preview of the content.
4. When you are finished, select Insert. Your Subdocument is now placed in the Design Surface. Remember that you will not be able to edit this content directly in the Design Surface. However, to learn more about your available options, visit the Subdocument Options section of the documentation.
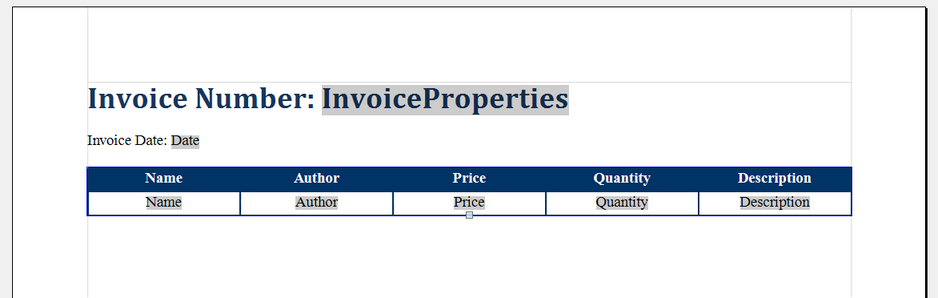
Figure 3: The Subdocument is added into the current Document Template.