|
Dynamic Properties |


|
|
Dynamic Properties |
|
The Dynamic Properties dialog is an incredibly useful tool for creating an intelligent Document Template. This dialog will allow you to change formatting entirely dependent upon values found within your data source, conditionally format objects in your template, and much more. An example of such usage would be if you had a collection of logo images to use for each of your customers. You can use Dynamic Properties to set up conditions testing your data source and then determining which of these images to use when producing your documents.
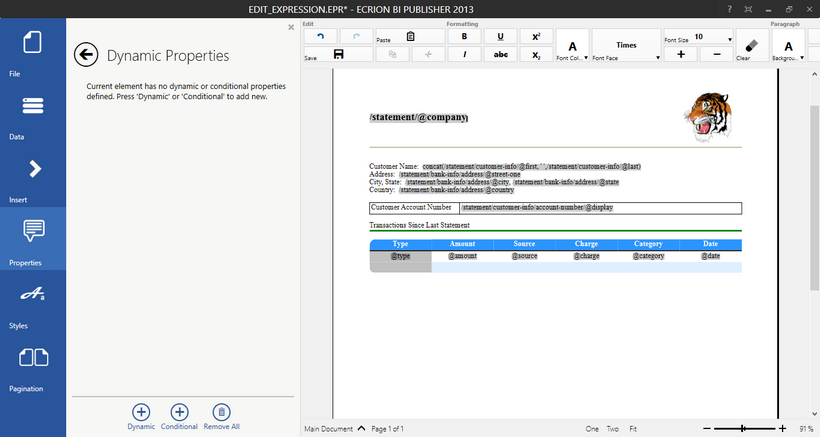
Figure 1: The Dynamic Properties dialog allows dynamic or conditional assignment of properties.
Usage
To demonstrate the usage of the Dynamic Properties Dialog, let's take the example in Figure 1 and make property modifications to both the company field and the image. Here are a few items we will address:
- We would like to use a specific font color provided in our data source for the inserted company Field. (Using a Dynamic Property From Your Data)
- When the company name equals "Ecrion" we would like to change the company logo to Ecrion's logo. (Using a Conditional Property)
Using a Dynamic Property From Your Data
The first step in assigning a property directly from your data source is to select the '+' button for Dynamic. A properties selection screen will now be opened. In this useful menu, you can use horizontal scrolling to navigate through options that are available to set with a Dynamic Property. In the menu you on the right, you can choose to filter specific property groups by checking and unchecking boxes, or you can even type a value in the search field to instantly find the property you are looking for.
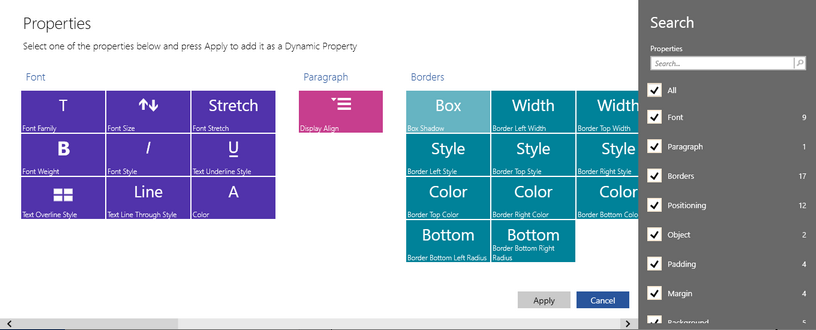
Figure 2: The Properties selection screen provides easy access for property selection.
In this example, we want to change the font color using a value directly from our data source. So we will select the Color property from the Font group and then select Apply. This will return us to the Dynamic Property dialog where we will need to make a few more configurations.

Figure 3: The chosen dynamic property is displayed in the Dynamic Property dialog.
Now that we've added a Dynamic Property, we can see this will be present in the Dynamic Property Dialog. Here we finish our configuration by first selecting a default value from the drop down list of colors. In this example, we will simply leave the default value as black.
The next step is to specify where this Dynamic Property will retrieve its value from. To do so, we must select Edit to launch the Edit Expression Dialog. Using this Common Tool, we will select the Color field that we know is in our data to drive this property. In this example, we can see the value in our sample data source is blue, but this will vary depending upon what data source is used. When we are happy with the selected item, we can proceed with selecting the Apply button and return to the Dynamic Property dialog.
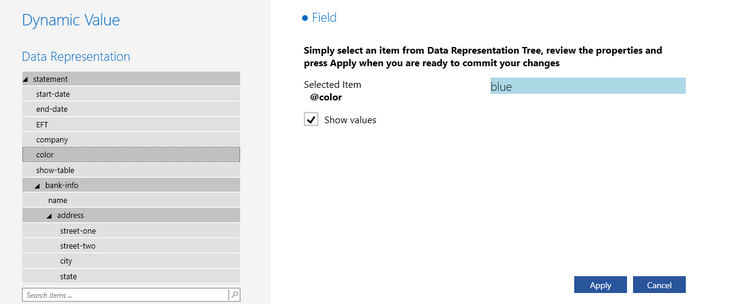
Figure 4: The color field is selected to be used if present in the data source.
You can continue to add as many Dynamic Properties as you would like for this Field following the same steps above. It is recommended that when you are satisfied with your property configurations, you preview your output document to test your modifications. In this example, we will preview to see if the blue font color is applied to the company name Field.

Figure 5: The color value found in the data source is used to change the font color to blue.
Using a Conditional Property
To set up the conditional assignment of properties based upon your data source, we first need to select the '+' button for Conditional. In this example, we'll select the image in our Document Template and change this to use the Ecrion logo when the company name is equal to "Ecrion" in our data source. Once we select the Conditional option, the properties selection screen will allow us to choose the appropriate property to modify.
Here we will choose use the filtering options in the right side menu to display only Image related properties. As you can see, one of our options is a Source property. We will choose this property and select Apply.
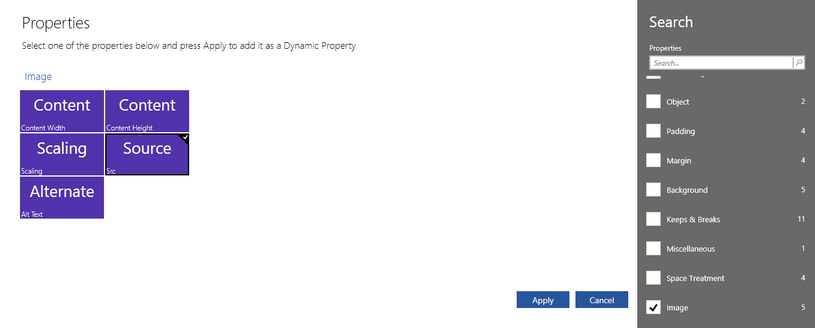 Figure 6: The Image Source Property is selected.
We can now see our selected property will be displayed in the Dynamic Properties dialog. The next step is to specify a default value. In this case, we can simply select the preview image to open the file of our choosing. We will use a standard image for this example.
The next step will be to select Add Condition to specify exactly what condition we want to use for our test. In this example, we want to construct an expression representing when the company name value equals "Ecrion".

Figure 7: The Image Source dynamic property is displayed in the Dynamic Property dialog.
When Add Condition is selected, the Edit Expression Dialog is opened so we can easily create our expression. Here we will build the appropriate expression using the helpful information found in the Edit Expression Dialog section of the help documentation. As you can see in Figure 8, we have selected the Company field in our data and set a condition its value for "Ecrion".
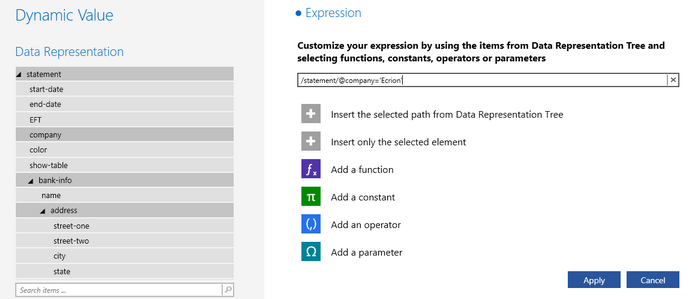
Figure 8: The conditional expression is created in the Edit Expression Dialog.
After we are satisfied with our Expression, we can select Apply to save these changes and return to the Dynamic Properties Dialog. We can now see that our condition is added to our Property for image source. The final step is to specify a the actual value we want to use if this condition is met. For this step, you can simply select a static value or select Switch to Dynamic Value to choose a value from your data source. For this example, we will select a static image in a local directory.
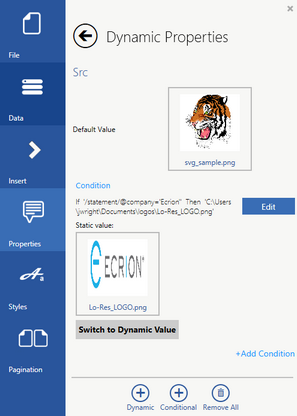
Figure 9: The conditional assignment of the image source property.
You should be aware that you can repeat this process to set up more conditions for this property by simply selecting Add Condition again and repeating the steps highlighted above.
When you have completed adding Dynamic Properties for any object in your Document Template, it is recommended that you do preview your output to test your results. In this example, we've added both a dynamic property directly from our data source (font color) as well as used a condition to test for a specific company name and use their logo image accordingly. Based upon these Dynamic Properties, we can change our sample data source to have "Blue" as the value for the color field and also change the value of the company field to be "Ecrion". With these values in mind, we should expect a blue company name to be displayed as well as the Ecrion logo in place of the default image. Below are the results of previewing both the default data values as well as the above changes.

Figure 10: The output with both color value set to blue and company condition met.

Figure 11: The output with no color field present and failing the company condition.