|
Alignment Options |


|
|
Alignment Options |
|
There are several ways you can change alignment for any given table cell when working in the Publisher. Use the instructions provided below to change alignment options within your table.
Using the Ribbon to Change Cell Alignment
1. Place your cursor in the desired cell to apply alignment changes to. The options provided will be related to where your cursor is located in the table.
2. Navigate to the Alignment Group under the Layout Tab in the Ribbon and select any of the available alignment options. You will notice that the alignment will be adjusted in the Design Surface and the applied alignment will be highlighted in the Ribbon.
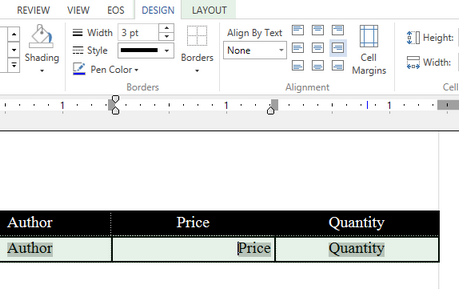
Figure 1: The applied alignment is noted in the Ribbon in blue highlight.
Using the Properties Pane to Change Cell Alignment
1. Place your cursor in the desired table cell in the Design Surface.
2. Enable the Properties Pane by selecting Properties located in the View Tab.
3. Select the Table Cell element in the Navigation Bar.
4. In the Cell Alignment Group, select the alignment you wish to apply.
5. You will notice that the alignment selected will be highlighted in blue in the Properties Pane and your alignment choice will be applied in the Design Surface.

Figure 2: The alignment choice is applied in the Design Surface.
Using the Align By Feature
You can align dynamic content present in your table by specific text values.
1. In the Design Tab select the Align By drop down menu to choose from available characters.
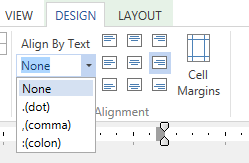
Figure 3: The dot option is selected to align by decimal separator.
2. Select the option you wish to apply to align by dot, comma, or colon.
3. Your alignment will now be applied and noted in the Ribbon for this table cell.
4. You should preview your output to ensure the behavior is as intended.
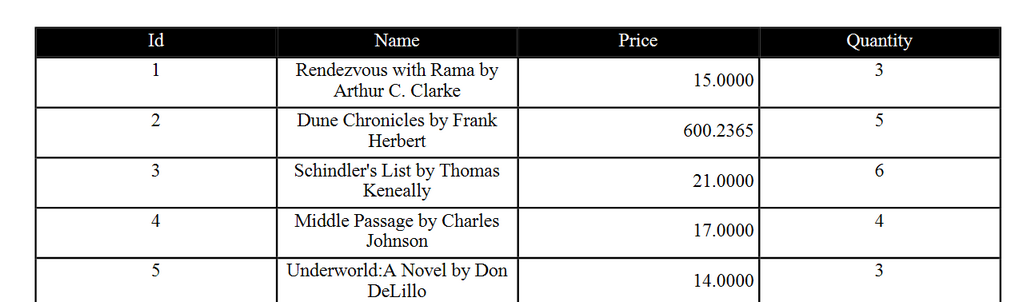
Figure 4: The align by dot is applied and the numbers are displayed correctly.