|
Configuring a Server |


|
Before you can access the options to start building your BI Dashboards, you will first need to Configure a Server. An instance of an Ecrion BI Server can have many In-Memory Databases deployed and your first step will be to connect to that server and select the In-Memory Database that you would like to use to drive your interactive Dashboard.
There are a few simple steps associated with configuring your server and accessing your In-Memory Database.
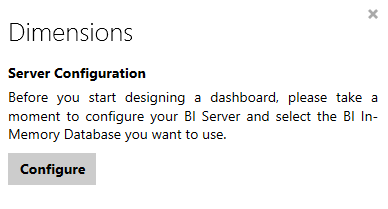
1. From the Dimensions Dialog select the Configure Button to launch the Configure Server Menu.

Figure 1: The Dimensions Dialog screen.
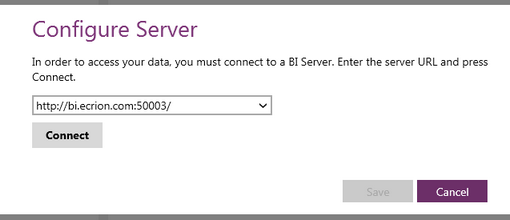
2. Using the Configure Server screen, enter your BI Server URL and select Connect.

Figure 2: The Configure Server screen.
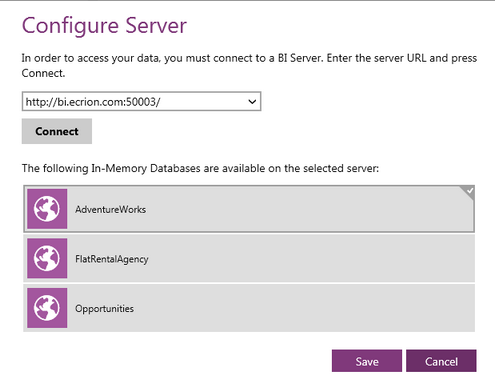
3. You must select the In-Memory Database that will be used for the current dashboard you are designing from the list of available In-Memory Databases. When making a selection, the item selected will show borders and a check mark to notify you it is selected as displayed in the image below.

Figure 3: Select the In-Memory Database you want to use.
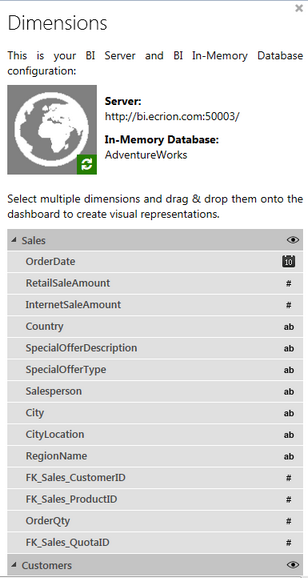
4. When you have make your selection select Save, and you will be returned to the dashboard design view, and the Dimensions Dialog will display the data Fields (dimensions) available to you.

Figure 4: The available data Fields as displayed in Dimensions Dialog.
Next Steps
Understanding Your Data - Learn how to preview your data to gain a better understanding for widget configuration.
Refreshing the Connection - Learn how to refresh the data source if changes are made.
Changing the Server - Learn how to change your server configuration settings.
Widgets - Learn about the types of Widgets you will be able to inserted into you dashboard.