|
Aligning and Resizing Dashboard Objects |


|
In addition to inserting powerful Widgets, Filters, and other objects into your dashboards, the BI Architect also provides you with some valuable tools for organizing and resizing your dashboard objects. You may find that you need to snap objects to align vertically or horizontally with respect to one another, or resize one widget to match another with a single click.
All of the features discussed in this section can be found in the Toolbar for easy access or completed in the Design Surface, and will make your design process simple and efficient.
Using Resize and Position Controls in the Design Surface
Using the Toolbar to Align Multiple Dashboard Objects
Using the Toolbar to Resize Multiple Dashboard Objects
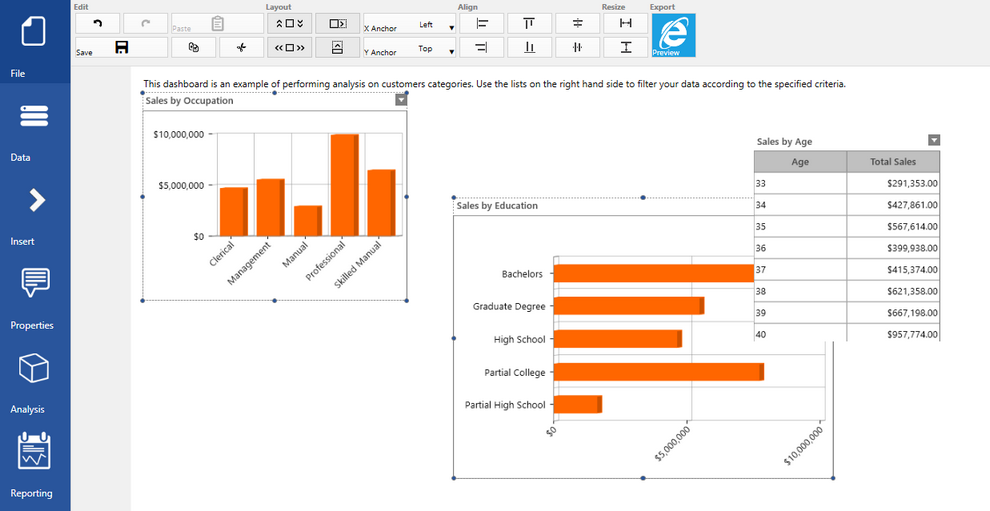
Figure 1: The Align and Resize options as seen in the Toolbar.
Usage
Before you start to use these features, let's first discuss how you can select multiple objects in the Design Surface and what this will mean to you as a dashboard designer.
1. Use an example with more than one Widget, Filter, or other object in the Design Surface. You can open the sample BID file "Adventureworkscustomers.bid" as demonstrated in the example in Figure 1.
2. Use your mouse to select one of the objects in the Design Surface.
3. Hold down the Control Key on your keyboard.
4. Use your mouse to select a second object. You will notice that both objects will contain resize controls on their respective perimeters.
At this point, there are two very important points to make now that you have selected multiple dashboard objects in the Design Surface.
| • | Pay close attention to the Toolbar. You will notice that the Align and Resize options are now activated and this should be visible to you as the buttons turn from Gray to Black. |
| • | A very import important piece of terminology for you to understand is the concept of the Pivot Object. The Pivot Object will be the last dashboard object you select. Why is this important to you? When using any of the Toolbar's resize and alignment options, it will automatically apply your choice to all selected objects with respect to the Pivot Object. Let's highlight this in an example for you. Let's imagine you select three charts in the Design Surface and the last widget selected has a width of 20px. If you were to select the Same Width Button, all of the widgets would be resized to the width of 20px. |
Using Resize and Position Controls in the Design Surface
There are also some very important controls that you can use directly in the Design Surface without using the Toolbar to align and resize objects.
| • | Resize Objects - you can resize individual or multiple dashboard objects at the same time directly in the Design Surface. To resize multiple widgets simultaneously, follow the instructions provided below: |
1. Select the Dashboard Objects you would like to resize. See the instructions provided above for more information on selecting multiple objects.
2. Using any of the resize controls present on either object, select with your mouse and keep the mouse button depressed. These dots along the perimeter allow you to drag and drop to visually see a preview of your objects resizing before you release the mouse button.
3. Drag the mouse and release. You will notice that both dashboard objects are resized simultaneously with respect to the proportional size relationship between the objects.
Figure 2: Two dashboard objects are selected in the Design Surface. |
Figure 3: Both objects are resized proportionally when using resize controls. |
| • | Reposition Objects - you can reposition many objects at once by also selecting multiple dashboard objects and using your mouse in the Design Surface to place in your desired location. When doing so, the objects will respect their current position in relation to one another and be placed where you release your mouse. Here are some helpful instructions. |
1. Select the dashboard objects you would like reposition in your dashboard. See the instructions provided above for more information on selecting multiple objects.
2. Place your mouse cursor over either of the dashboard objects, and you will notice that the cursor changes from a single arrow to a four way arrow. This is your indication to click and hold to move this object or objects to another location. Press the left mouse button and hold down.
3. Drag your mouse across the Design Surface. You will notice that the dashboard objects will be dragged until you release the mouse button, but more importantly they will preserve their position with respect to each other.
Figure 4: Two dashboard objects are selected in the Design Surface. |
Figure 5: Dashboard objects are moved in the Design Surface maintaining respective positional relationship. |
Using the Toolbar to Align Multiple Dashboard Objects
When working with your dashboard objects you will certainly want to utilize the quick access alignment options as provided by the Align Section in the Toolbar. Using these options, you can easily select multiple objects in the Design Surface and instantly align them with respect to one another. This is a useful feature as visually you will want to align objects with respect to the position of a second object. In this section, we help explain how to use this feature and provide a helpful example that you can follow.
1. Select multiple dashboard objects in the Design Surface. This will now enable the Align Features in the Toolbar. In the example in Figure 6, the Pivot Object is the table widget because we want to align the objects vertically with that object. NOTE: Remember, the second object you select is called the Pivot Object and this is the object that will be used to align all other selected objects to.
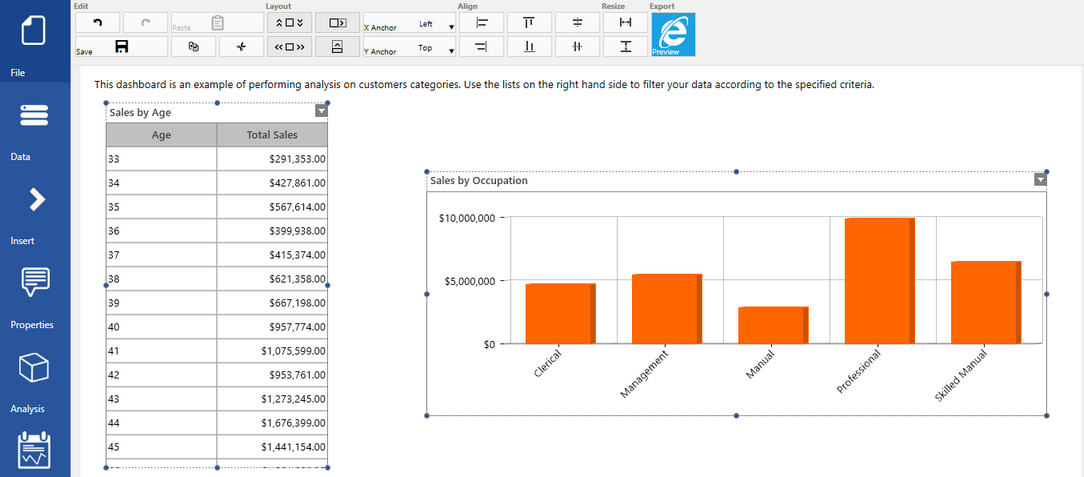
Figure 6: Multiple objects are selected in the Design Surface and the Align Options are enabled in the Toolbar.
2. Next, you can mouse over the available buttons in the Toolbar. When doing so, you will notice a helpful tool tip window will be displayed to confirm your desired alignment option.

Figure 7: A helpful tool tip is displayed when mousing over buttons in the Toolbar.
3. Now simply select the button that you would like to apply. You have options to Align Top, Align Bottom, Align Left, Align Right, Align Center Horizontally, and Align Center Vertically. Below are a few examples demonstrating each option.
| • | Align Top - align the objects with the top of the Pivot Object. |
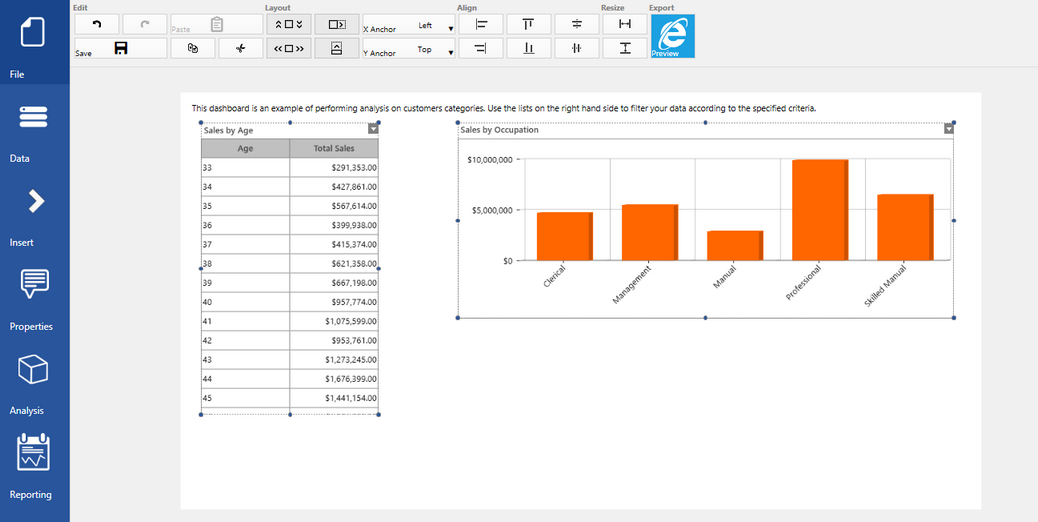
Figure 8: Align Top is applied to both objects with respect to the table as the Pivot Object.
| • | Align Bottom - align all objects with the bottom of the Pivot Object. |
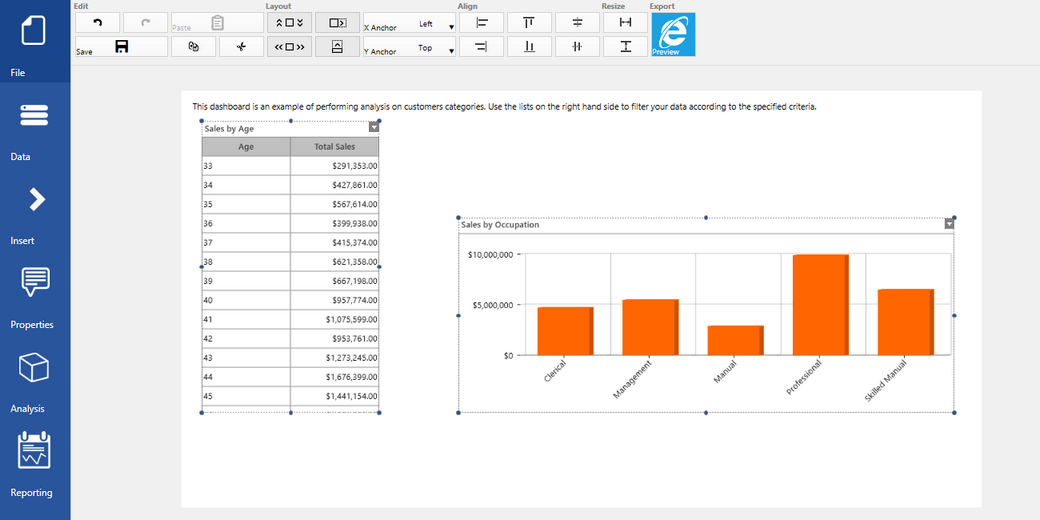
Figure 8: Align Bottom is applied to both objects with respect to the table as the Pivot Object.
NOTE: For the following two examples, we would have to vertically position both dashboard objects so that when we align left or right, they will not overlap.
| • | Align Left - align all objects with the left of the Pivot Object. |
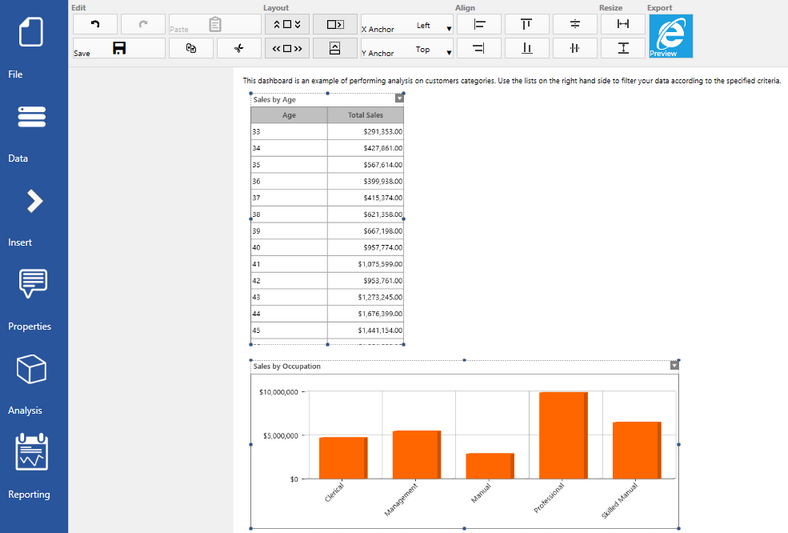
Figure 9: Align Left is applied to both objects with respect to the table as the Pivot Object.
| • | Align Right - align all objects with the right of the Pivot Object. |
NOTE: Figure 10 is included to demonstrate the behavior given that the dashboard cannot provide the correct amount of space to accomplish this alignment.
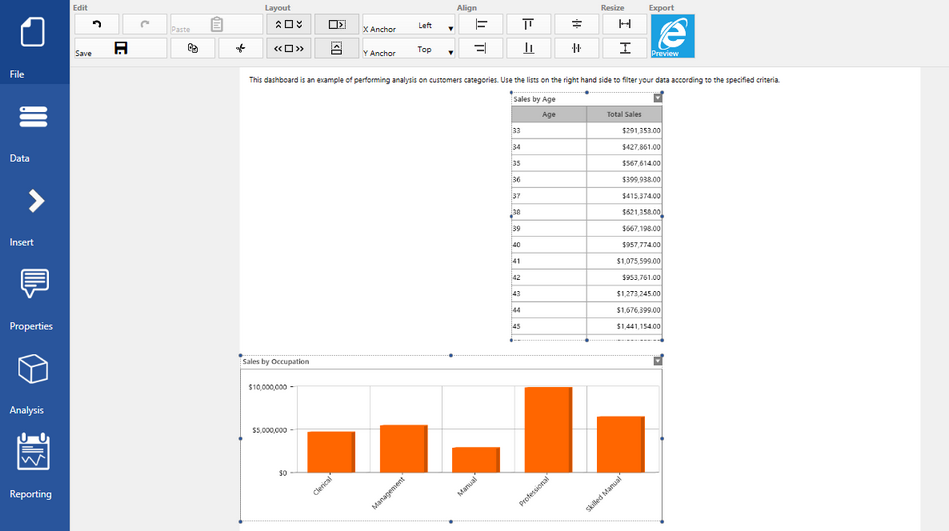
Figure 10: Align Right is applied to both objects with respect to the table as the Pivot Object.
| • | Align Center Horizontally - align all selected objects centered horizontally with respect to the horizontal center the of the Pivot Object. |
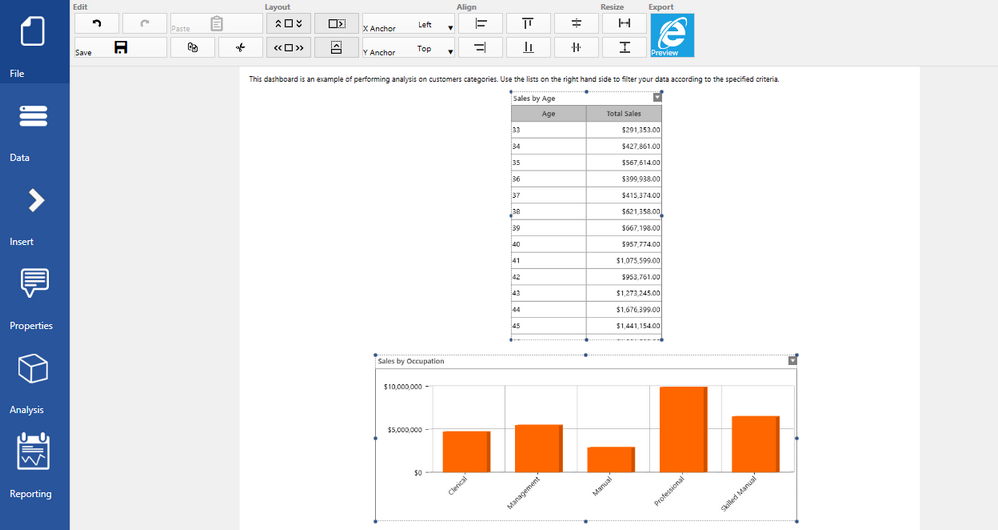
Figure 11: Align Center Horizontally is applied to both objects with respect to the table as the Pivot Object.
| • | Align Center Vertically - align all selected objects vertically with respect to the vertical center of the Pivot Object. |
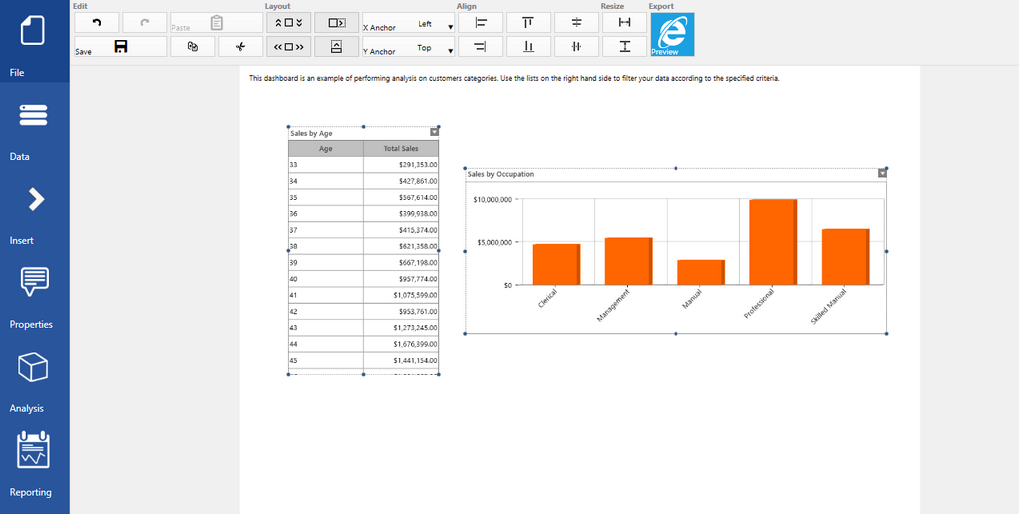
Figure 12: Align Center Vertically is applied to both objects with respect to the table as the Pivot Object.
Using the Toolbar to Resize Multiple Dashboard Objects
You can also resize multiple dashboard objects to resize to meet the dimensions of the selected Pivot Object in the Design Surface. This may be helpful when you want to add some visual consistency in size to many of your dashboard objects.
1. First, select the multiple dashboard objects that you would like to resize ensuring that you select the desired Pivot Object as the last item selected. We'll show you an example of trying to resize three dashboard objects.
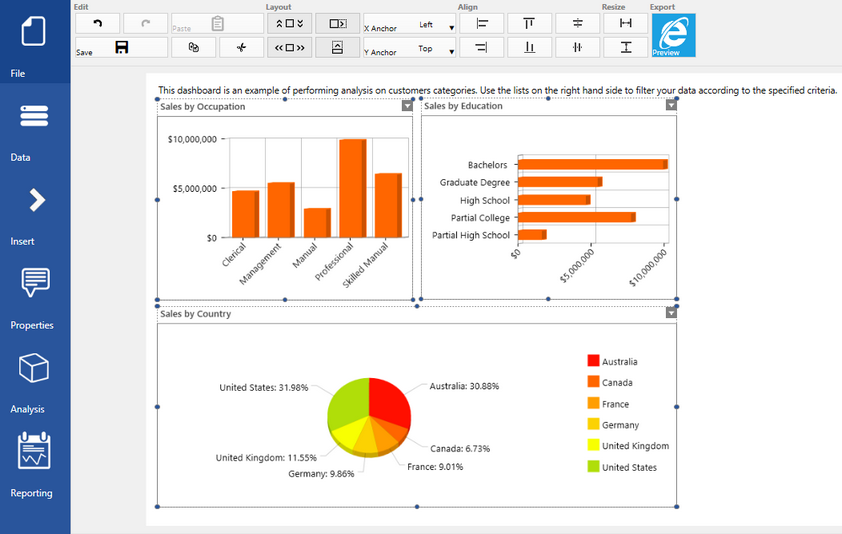
Figure 13: Multiple dashboard objects are selected with "Sales by Occupation" as the Pivot Object.
2. Next, you will have two options to resize using the Toolbar buttons in the Resize Group: Same Width and Same Height. Again, this will be in relation to the Pivot Object selected and the BI Architect will change all selected dashboard objects to match the width or height as you have selected. In this example, we will select the Same Width button in the Toolbar to resize all objects to have the same width as the "Sales by Occupation" chart (as this was selected as our Pivot Object).
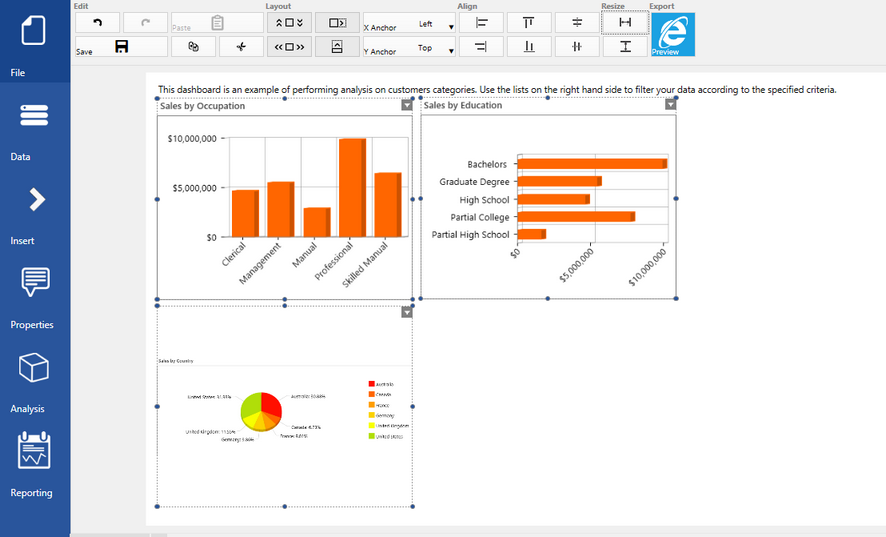
Figure 14: The Same Width option is used to resize all objects to be the width of the Pivot Object.
You may also be interested in the following topics.
Widget Marking - link widgets through powerful coloring and filter displays in your dashboards.
Dashboard and Widget Behavior - control overall dashboard size and configure your widget's behavior as windows are resized.
Tutorials
Dashboard Layout Options - In this video you will be introduced to the different layout options. These options include grouping, resizing, and moving widgets, as well as options for size and alignment.