|
Get XML Data From Folder |


|
This task, available to you in Ecrion Omni System, is useful for instructing Ecrion Omni System to obtain your XML Data Source from a local or network directory that is accessible to Ecrion Omni System. It may be helpful to you if you are placing your input XML data files in a particular directory to be retrieved from. By using this task, Ecrion Omni System will look in the location you specify and use the XML file located there.

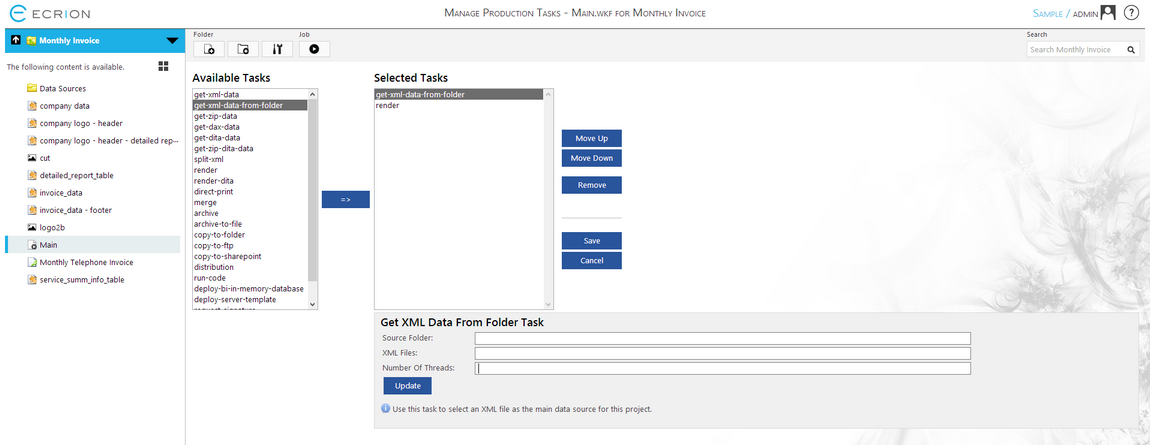
Figure 1: The get-xml-data-from-folder task is highlighted in the Selected Tasks menu.
Configuration
Once the get-xml-data-from-folder task is selected in the Selected Tasks menu, a configuration menu will be available below. The following steps will assist you in configuring this task.

Figure 2: The configuration menu for the get-xml-data-from-folder task.
| • | Source Folder - Specify the source folder for Ecrion Omni System to retrieve your XML File from. This can be a local directory or a network path. NOTE: You must ensure proper rights are configured on the source folder to allow Ecrion Omni System read and write access. |
| • | XML Files - You will need to specify the names of your XML files to be retrieved. If you would like Ecrion Omni System to obtain any XML files located in the directory, wildcard usage (*) is supported. The example in Figure 2 demonstrates the configuration to obtain any XML files located in the specified Source Folder. |
| • | Number of Threads - In addition, you can also specify the number of threads you would like Ecrion Omni System to utilize to complete this task. This can be valuable when, for example, obtaining thousands of source files that need to be retrieved for document production. Here you will need to manually specify the number of threads for this process to use. |
Make sure you select Update to ensure Ecrion Omni System has captured your task configurations for the get-xml-data-from-folder task. When you workflow is executed, Ecrion Omni System will now look in the specified directory and obtain the XML files you have specified. Often times, you may wish to move these files when the job is complete. For more information on this type of task, visit the Storage and Distribution section of the help documentation. If you finished configuring the Job, select the Save button in order to save all the settings for the Job.