|
Copy to Sharepoint |


|
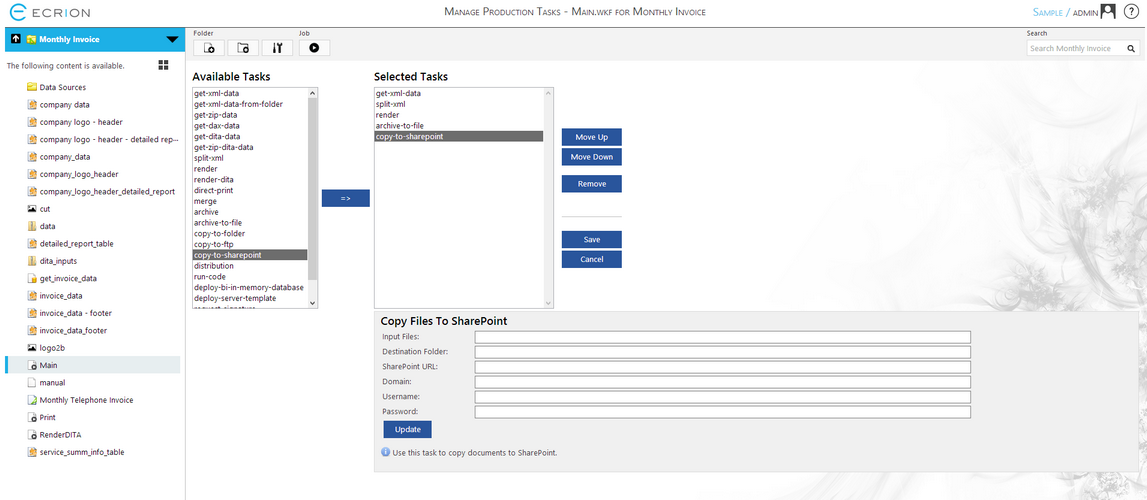
The copy-to-sharepoint task is available for you to push files to a SharePoint instance. In this task, Ecrion Omni System will communicate directly to the URL specified to push specified files to the SharePoint URL specified.

Figure 1: The copy-to-sharepoint task is selected in the Selected Tasks window.
Configuration
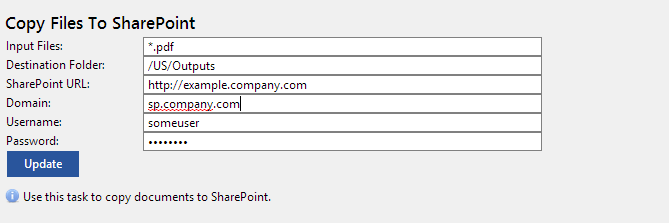
After transferring the copy-to-sharepoint task to the Selected Tasks menu, you will have access to the configuration menu below. Below we have described some helpful information on each field that must be configured to make this task work appropriately in your workflow.

Figure 2: The copy-to-sharepoint configuration menu.
| • | Input Files - Here you will specify the files to be used by this task to be sent to SharePoint. In Figure 2, we have specified the PDF outputs produced by this job to be sent by the copy-to-sharepoint task. |
| • | Destination Folder - You will need to tell Ecrion Omni System exactly what folder to place these files into. This will require knowledge of the SharePoint instance and its folder structure. In Figure 2, we have used a sample structure to copy the PDF files to the "Outputs" directory. |
| • | SharePoint URL - In this step, you need to add the URL of the SharePoint instance. |
| • | Domain - Specify the appropriate domain associated with your SharePoint instance. |
| • | Username - You will need to specify the user name to access the SharePoint instance. NOTE: The user must have access writes to write a file to the SharePoint directory provided. |
| • | Password - Here you will need to add the password associated with the provided username. |
When you are finished making your configuration changes, you can proceed with further workflow configurations. Be sure to select Update before navigating away from the Manage Tasks page. If you finished configuring the Job, select the Save button in order to save all the settings for the Job.