|
Archive to File |


|
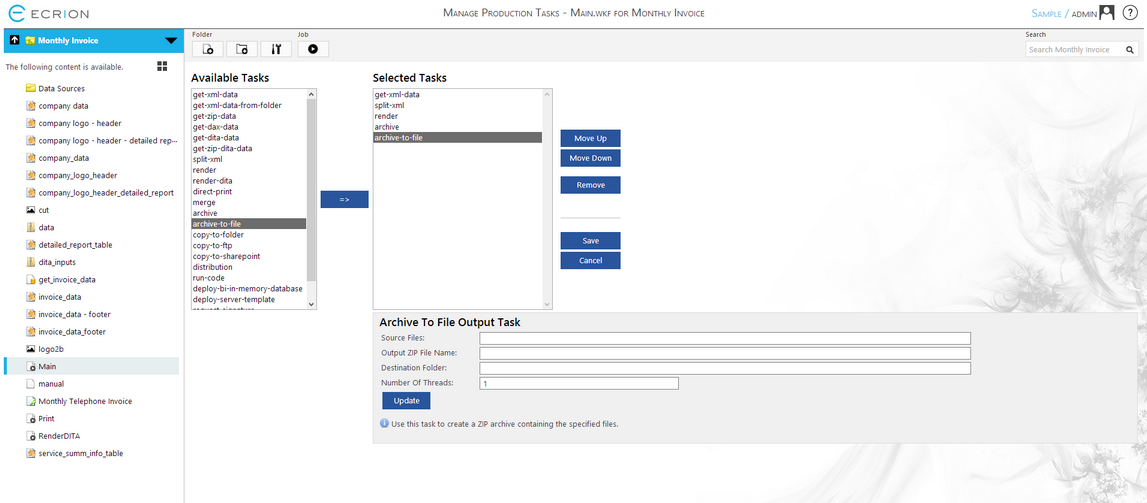
The archive-to-file task is available for you to use when you would like to create a ZIP File containing specified job files and then immediately copying this file to a specified directory of your choosing. You can use this task, for example, to create a ZIP File containing all of your input sources and pushing to a storage directory for later reference.

Figure 1: The archive-to-file task is selected in the Selected Tasks Menu.
Configuration
After selecting the archive-to-file task, you will see the Configuration Menu for this task present below the Selected Tasks Menu. Here we will highlight the configurations required to set complete this task setup.

Figure 2: The Configuration Menu for the archive-to-file task.
| • | Source Files - Your first step will be to specify which source files to be placed in the resulting ZIP file. Figure 2 demonstrates using a wildcard '*' to ZIP any produced PDF files when a job is run. However, this can be the file type of your choosing. |
| • | Output ZIP File Name - Next, you will need to give the output ZIP file a name. Here you can specify the name of the ZIP file to be produced. |
| • | Destination Folder - Here you must specify the destination folder for Ecrion Omni System to push the resulting ZIP File to. If utilizing a network directory, you must make sure that Ecrion Omni System service account has network access to write to this directory. |
| • | Number of Threads - Here you can specify the number of threads Ecrion Omni System will use to complete this task. For larger jobs, manually changing the threads here may have a performance impact. |
Once you have completed the configuration of the above options, make sure to select the Update button to ensure your workflow changes are saved. If you finished configuring the Job, select the Save button in order to save all the settings for the Job.