|
Data Transformation And Ingestion Output |


|
When working with Data Transformation and Ingestion, we refer to this as Database Output. This output type is used for creating data base tables and appending to or replacing current tables in a database. With this goal in mind, it is important to understand the different ways that you can structure your output to meet these needs. In this section, you can find information on creating and structuring Database Output.
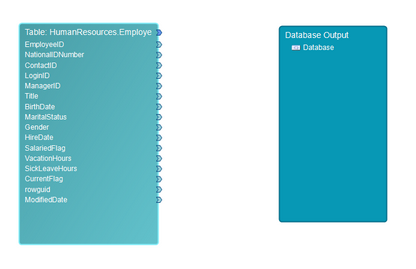
Figure 1: The Database Output when beginning diagram design.
Structuring Data Output
You might notice that if you attempt to create any data connection from your input data source to your output Database Object, you will not be able to succeed. This is because the first step that needs to be accomplished is actually setting up the structure of your Database Output. To do so, you will need to follow the instructions below.
Double click on the Database element in the Database Output Object. In the Properties Dialog, you will need to specify which database connection to use for this output and make additional configurations through pre and post processing SQL commands.
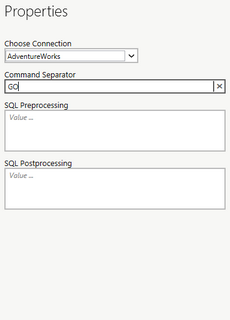
Figure 2: The Properties dialog for the Database field.
Right Click on the Database element to access the Application Bar. In the Application Bar, you will need to select Add Schema. In this step, you will be creating a particular schema (or structure) to be used in this Database Output. In the resulting Insert Schema Dialog, provide a name and select Insert. You will notice in the output object that your schema will now be present.
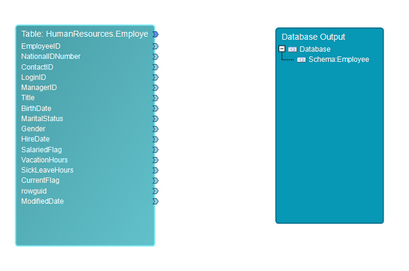
Figure 3: A Schema is added by right clicking on the Database element.
Next, you will need to add a Table. Right click on the schema that was created in the output diagram object. In the Application Bar, select Add Table. This process will launch the Add Table Dialog for some additional configuration steps.
- Specify the name of your table.
- Select the Command Type to either be insert (to add a new database table) or update (to override or append existing data in a current table).
- Select Add Column to create table columns. You must specify a name and value type for each column in your table.
When you have completed your configuration, select Insert.
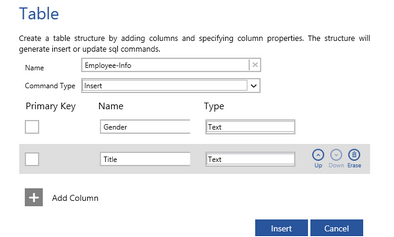
Figure 4: The Add Table dialog is used to add a database table.
In this example, we've added two columns and mapped input data from a current table in our database.
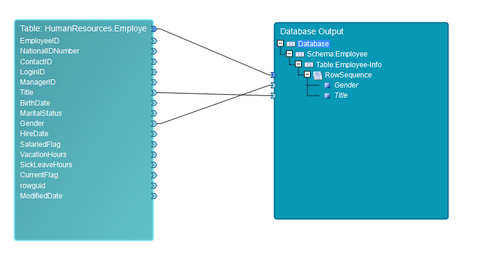
Figure 5: Data in a current table will be used in the creation of a new database table.
The result of this diagram will be to create to insert a new table called Employee-Info in our specified database that will contain two columns.