|
CSV |


|
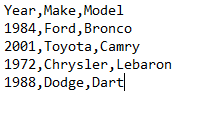
A Comma-Separated Values file stores tabular data in plain text. These files normally consists of records with fields that are separated by tabs or commas. These can also be used as data sources when working in the BI Data Analyst to design your Data Diagrams.

Figure 1: A Sample CSV file.
Usage
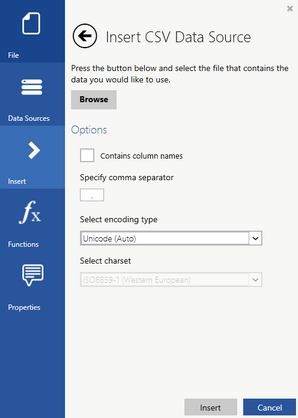
By selecting Insert in the Side Menu, you can locate the CSV File option in the Other Data Sources group. By selecting this option, you will now have access to the Insert CSV Data Source Dialog. Below, you can find information on the available options in this dialog.

Figure 2: The Insert CSV Data Source dialog provides related options for inserting.
You will first need to select Browse to navigate to your CSV File and select the file of your choice. Next, specify the options as follows:
| • | Select the Contains Column Names check box if your initial record row contains column names. |
| • | In the Specify Comma Separator field, add the separator that is used in your CSV File. In the example in Figure 1, a comma is used. |
| • | Select the Encoding Type by using the drop down menu. |
| • | For ANSI & Multibyte encoding selections, you can select a Charset from the Select Charset drop down menu. |
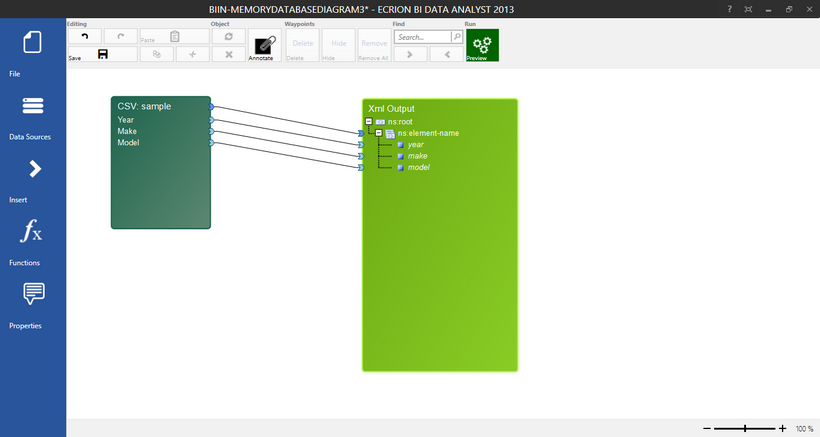
When you have completed your option selections, select Insert to insert the CSV File Object into your Data Diagram. You will notice the dark green CSV File Object will now be present in the Design Surface and you can proceed with mapping your data using Data Connections. In this example, you can see the CSV File in Figure 1 is represented appropriately and the first record row containing the column names is displayed. 
Figure 3: A CSV File is used as a data source.
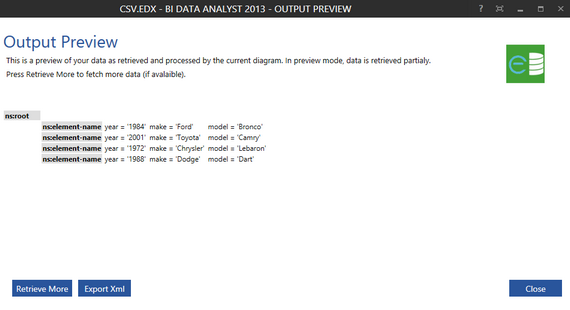
The results of this Data Diagram yield the data retrieved from the CSV File now contained in an XML Output File.

Figure 4: The CSV File content is now in the XML Output.