|
Using a Data Field for Your Barcode Value |


|
|
Using a Data Field for Your Barcode Value |
|
This example highlights the usage of the Insert Barcode Dialog to configure your barcode to obtain its value from the data source.
Understanding Your Data
To begin, you will need to know exactly where in your data you have informtion to drive the generation of this barcode.
Using the Insert Barcode Dialog to Configure
1. From the Insert tab in the Ribbon select the Barcode button.
2. In the Insert Barcode Dialog, you will notice a Dynamic Values button. Upon selecting this button select the Dynamic Value button in the default value section.
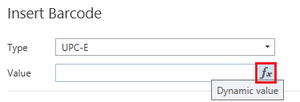
Figure 1: The Dynamic Value button is selected from Default section.
2. In the resulting Dynamic Value Dialog, select the data field that you wish to use to obtain the value from the Data Tree. You will notice that your selection will be highlighted in the Data Tree. It is important to note that in this step, you can also select Create Expression to merge multiple data fields together or use a more complex function to drive the value of your barcode.
3. When you are finished with this configuration step, select Apply, and you will be returned to the Insert Barcode Dialog. Notice that your dynamic configuration will be displayed to you giving you valuable information about where the value of the barcode will be obtained from.
4. When you are satisfied with your barcode type and other configurations, select Insert to insert the barcode into your document template.
5. It is recommended, at this point that you test your configuration by modifying the data field in the Publisher and previewing your outputs. Here you will be able to see that the barcode is obtaining the correct value from the data source when rendered to an output.
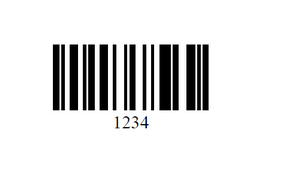
Figure 2: The value '1234' is obtained from the "barcode" attribute and used for the barcode.