|
Inserting or Deleting Rows and Columns |


|
|
Inserting or Deleting Rows and Columns |
|
Follow the instructions provided below to add or remove rows or columns from your inserted table.
Use the Ribbon to Add or Remove Rows or Columns
1. Start by placing your cursor inside a cell in the row or column you wish to use as reference. The options provided will be related to where your cursor is located in the table.
2. To delete a row, column, or the entire table, select the Delete button in the Layout Tab and choose from available options to delete the current row or column or entire table your cursor is positioned in.
3. To insert rows or columns, simply select from the available buttons Insert Above, Insert Below, Insert Left, or Insert Right. Insert Above and Below are related to adding table rows and Insert Left and Right are related to inserting columns. Once you make a selection, a row or column will be inserted relative to where your cursor was positioned in the table.

Figure 1: The Layout Tab in the Ribbon for the inserted table.
Use Right Click Menu to Add or Remove Rows or Columns
1. Begin by placing your cursor in the desired reference row or column. The options provided will be related to where your cursor is located in the table.
2. Right click to reveal a contextual menu. Select Insert to expose more options for adding rows, columns, and headers and footers. Select from the available options to insert a row above or below or add a column to the left or right relative to where your cursor is placed.
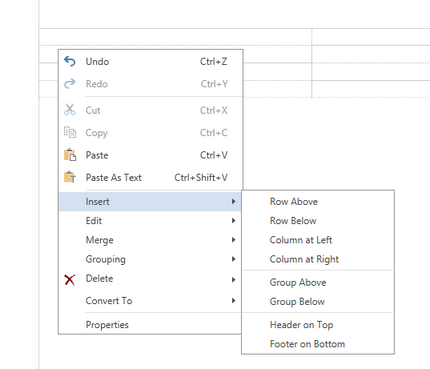
Figure 2: By right clicking options are found to insert rows or columns.
3. To delete rows, columns, or the entire table, select Delete and expose options to delete the current row, column, or delete the entire table.

Figure 3: By right clicking, options are found to delete current row, column, or the entire table.