|
General Application Instructions |


|
|
General Application Instructions |
|
To apply conditional formatting for any object in your document template, use the provided instructions below. The instructions will demonstrate applying conditional formatting to a field based upon a specific condition specified.
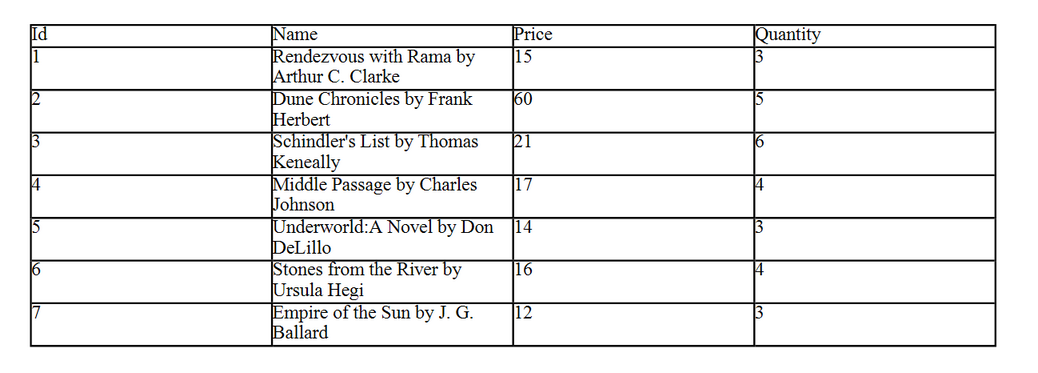
Figure 1: The table as currently output without any conditional formatting.
Using the ALL Menu
1. Select the object you wish to add conditional formatting to in the Design Surface and right click. From the resulting contextual menu, select Properties to launch the Properties Pane. Note: If you are looking to add conditional formatting to a table row or other object you cannot fully select, you can always select in the Navigation Bar of the Properties Pane after opening.
2. Make sure to select the target element for object you would like to set the condition on in the Navigation Bar and select the All Menu.
3. Select the Dynamic value button next to the property you would like to adjust. You will now be presented with the Dynamic Property Dialog, here you will select the Add rule button.
4. In the Create Condition Dialog you will need to specify a condition for which the formatting will change.
a. Select in the Data Tree the data value to base your condition on.
b. Then, choose your type of condition based on available options for based on occurrence, numerical value, or text value.
c. Then specify the details of your condition for contains or starts with using the drop down menu available and then add the value to test for. You can create more complex conditions manually by selecting the Create Expression button. When you are finished configuring your condition, select Save.

Figure 2: The Create Condition Dialog is used to specify a condition for formatting.
5. Specify what formatting to use when the condition is true. You can select a static value from the available drop down list, or even configure a dynamic value to be retrieved from the data source by selecting Dynamic Value button for the condition. Regardless of your selection, this value will be used as formatting for your property when the condition evaluates to true. In our example, we have selected red to be used for the font color property when the condition is met.
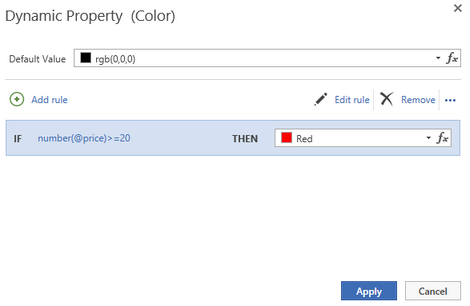
Figure 3: The value to be used for the conditional application is selected.
Once you have set your condition select save and you will be returned to the Design Surface. Now you should test your results by previewing your output. You should edit your data source changing the values to test if your configured conditional formatting is behaving as intended. In Figure 4 you can see that the condition is evaluated and the formatting is applied exactly how it was intended.
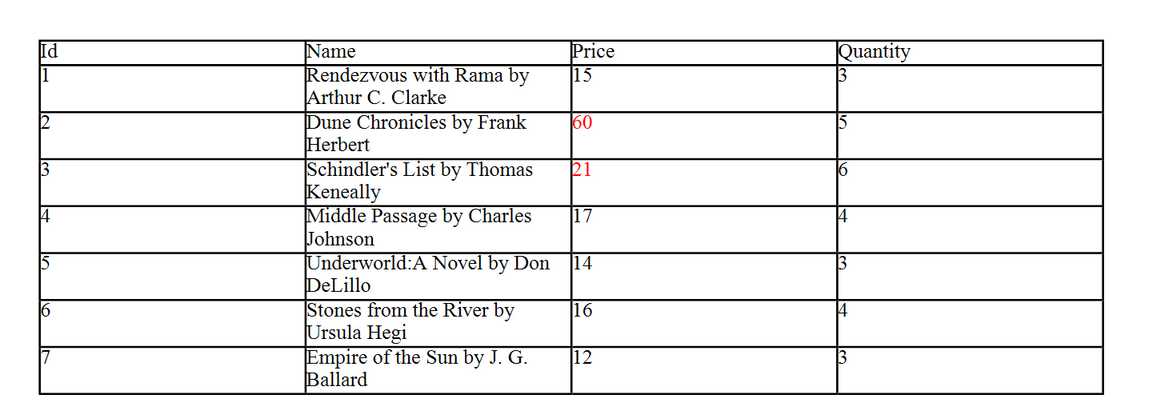
Figure 4: The font color property is changed to red when the condition is met of a price value greater than or equal to 20.