|
Reporting |


|
This section describes how to assign one or many custom reports associated with your dashboard in addition to setting up a default report to be used in your dashboards. Because the BI Architect platform includes Ecrion Document Automation technology, dashboard users can generate reports integrating their dashboard information with conditional formatting, pagination features, and much more by simply selecting the Generate Report button . Here you can specify which reports will be available to your dashboard viewers.
Adding a New Report
If you have designed a custom report in the BI Publisher that you want to have accessible to your dashboard viewers when they are working with this dashboard, you will first need to associate this report with the dashboard. This section describes how you can Add a New Report to be associated with your dashboard.
Important Pre-requisite
It is important to note, that there are a few steps that first need to be taken into consideration before adding a report to be associated with your dashboard. You must first ensure that you have configured a report in the BI Server management console. This report will be used as a server template and you can learn more about such configuration steps in the BI Server help. To view your available reports, you can open the Management Console and visit the Reports section as demonstrated below.
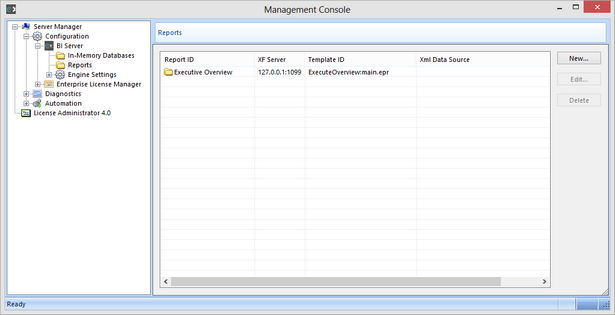
Figure 1: A report configured in the Management Console.
The steps that you will follow below for Associating a New Report to your dashboard will require you to know the Report Name that you have configured in the BI Server Management Console. Figure 5 displays an image of this report configuration.
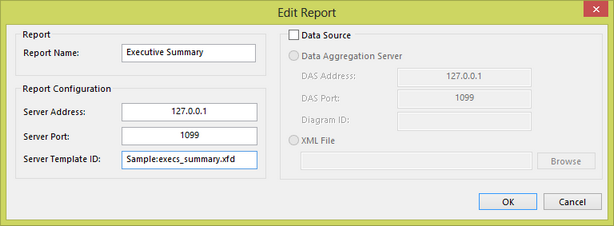
Figure 2: A Report is configured for later use in the BI Server Management Console.
Associating a New Report
To add an associated report that will be available to your dashboard viewers, follow the steps highlighted below.
1. First, you will need to select the Reporting button located in Side Menu to access the Reporting Dialog.
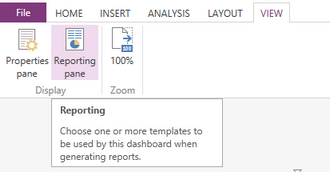
Figure 3: The Reporting Dialog provides an option to Add New Report.
2. Next, select Add New Report. Once this option is selected, a report selection menu will be displayed in the Reporting Dialog.
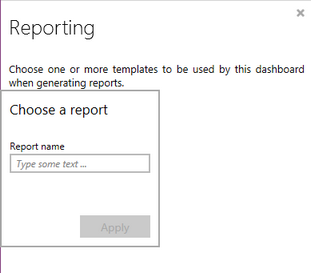
Figure 4: A menu to add a new report will be displayed in the Side Menu.
3. You will now need to specify the Report Name as given in your configuration of the report in the BI Server Configuration. In the example in Figure 8, the report name 'Executive Summary' is used because this is the name given in the BI Server configuration (see Figure 5).
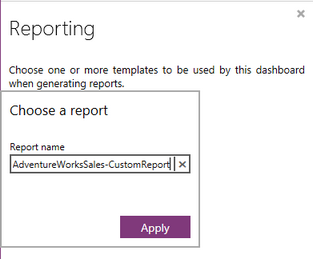
Figure 5: The Report Name is added in the required field to Add a New Report.
4. Once complete, select Apply to finish the addition of your report. You will notice the report will now be listed in the Reporting Dialog along with any other reports you may have already configured to be associated with this dashboard.
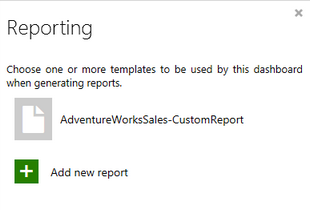
Figure 6: The newly added report is displayed in the Reporting Dialog.
Testing
As you can see in Figure 10 below, when your dashboard viewers select the Generate Report button in the dashboard Preview, they will see the option to select your added associated reports.
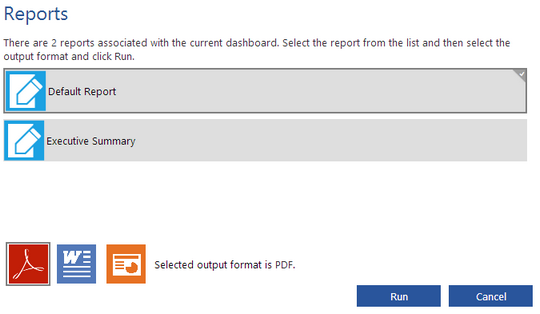
Figure 7: Report selection as seen in the Preview of a BI Dashboard.
We highly recommend that you test your Added Reports by first previewing from the BI Architect and then testing the report generation. If you should encounter any errors, we recommend that you ensure that the Report Name you have added in the BI Architect directly matches that of the report you have configured in the BI Server Management Console.