|
Cross Table Properties |


|
The Cross Table Properties Pane can be used to make targeted visual modifications to your cross table or make changes to your data configuration to add columns, rows, and more.

Figure 1: The Properties Pane is used to modify specific areas of a cross table for coloring.
Description:
The example in Figure 1 demonstrates the usage of the Properties Pane to customize the visual design of a cross table in a dashboard. You can use the Properties Pane to customize your Cross Table Widget. The example in Figure 1 demonstrates how you can easily change the background color of the row-headers, column-headers, and table body by selecting the appropriate elements as the Target Element in the Navigation Bar.
Access:
For information on how to access the Properties Pane please view the helpful Working With the Properties Pane pages for the specific display mode you are using: Mouse Display or Touch Display.
Usage:
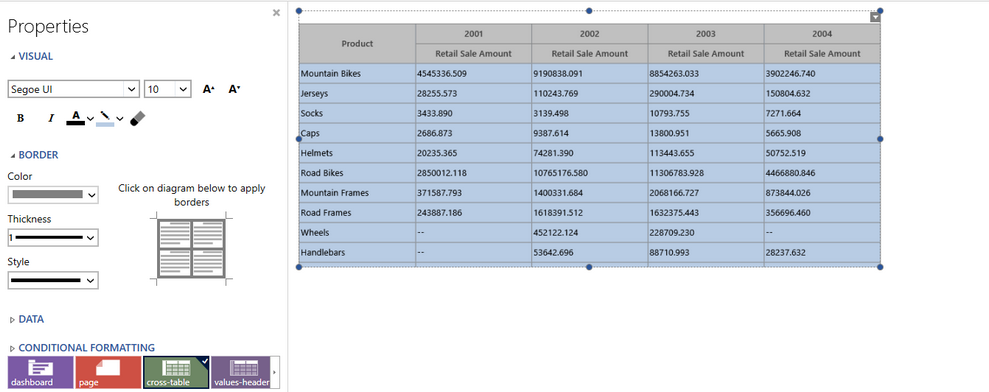
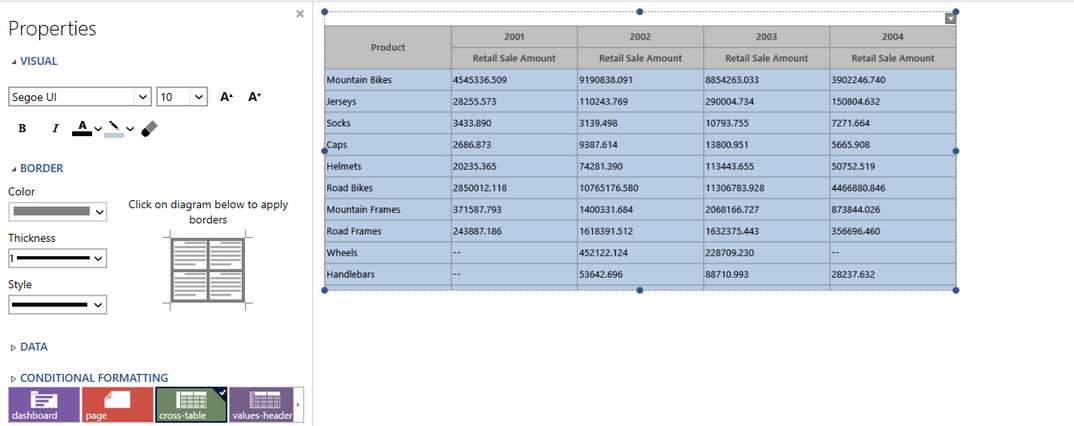
Figure 2: Cross-table element selected as target object. |
Figure 3: Columns-header element selected as target object. |
The Ecrion BI Architect will allow you to change many properties to modify or improve your cross table widgets. At the bottom of the Properties Pane, you must first select the Target Object that you wish to change in the Navigation Bar. The properties that are displayed for modification in the dialog will be dependent on your selection.
Figure 2 demonstrates the selection of the cross-table element in the Navigation Bar. Notice that beyond making visual modifications, you can also access your data configuration for the cross table widget. For more information on editing your data configuration for a cross table, visit Insert Cross Table.
Figure 3 demonstrates the selection of the columns-header element in the Navigation Bar. Notice that the choices for properties modifications is different. Modifications made here will be applicable only to the columns-header.
The Navigation Bar will display elements that will fit in the Properties Pane bar window. However, you can scroll to the left or right accordingly to access all elements.
Important Properties:
The example in Figure 4 highlights how you can make targeted modifications to your cross table. Below is brief description of these modifications.

Figure 4: The Properties Pane is used to modify the internal borders of the cross table.
| • | By selecting the cross-table element in the Navigation Bar, you can change the background color of the body of the entire table. Select the Background Color button in the Visual options and choose a dark blue. Notice how this area is represented in the dark blue color in Figure 4. |
| • | By selecting the columns-header element in the Navigation Bar, you can change the background color of this header content. Select the Background Color button in the Visual options and choose a light gray. Notice how this area is represented in the light blue color in Figure 4. |
| • | By selecting the row-header element in the Navigation Bar, you can change the background color of this header content. Select the Background-Color button in the Visual options and choose a grey shade. Notice how this area is represented in the grey color in Figure 4. |
| • | In the Borders options, select the drop down menu for Color and select white. Then in the borders preview image in the Dialog Bar, click on the internal borders to apply the white borders to the cross table and notice how the white borders are displayed in the preview image and in the cross table in the Design Surface. |
Your modifications made in the Cross Table Properties should be displayed in the Design Surface as you work.
If you are using the Cross Table Properties to make modifications to your data configuration, you can learn more about these adjustments by visiting Insert Cross Table.
Tutorial:
Inserting a Cross Table - In this tutorial you will learn how to configure and insert a cross table, as well as how to edit the table using the Properties Pane.