|
Working with Tables |


|
Tables are used to structure information in a row and column format that provides advanced display of data points. There are two types of tables that you are able to insert while working within Ecrion Omni System, static and dynamic, in this section we will highlight how to insert both types.
Inserting tables with the Online Editor in the Ecrion Omni System will create simple tables, without formatting capabilities. If you should need to format the tables more, it is best to open your template with the Publisher.
Static Tables
1. Select the Table button from the Insert group.

Figure 1: The Table button is highlighted in the Insert group.
2. You will need to decide how many rows and columns you need for your table. You can also toggle the header and footer on or off as you need to. NOTE: This is the only place where you will be able to select a header or footer row.
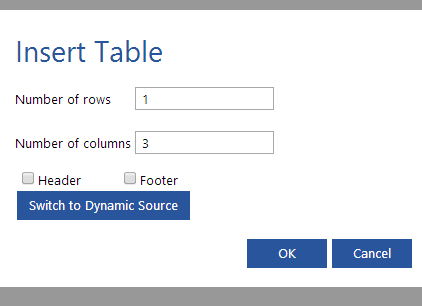
Figure 2: The Insert Table configuration window default setting.
3. Once you have configured the table settings select OK. The table will be inserted into your template, where you will be able to add dynamic or static content as you need.
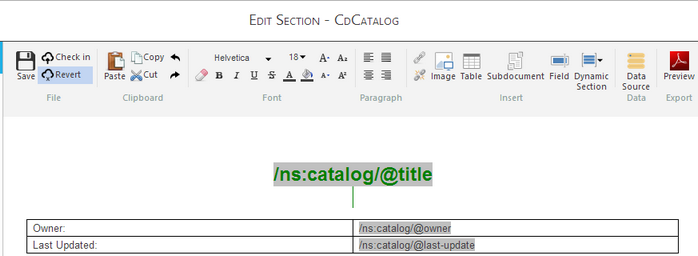
Figure 3: A static table has been inserted, and both static and dynamic content has been added.
Dynamic Tables (Repeating Tables)
1. Select the Table button from the Insert group.

Figure 4: The Table button is highlighted in the Insert group.
2. In order to create a dynamic table select the Switch to Dynamic Source button.

Figure 5: The Switch to Dynamic Source button is located in the Insert Table window.
3. You will need to select which repeating element from your data source you with to have the table be dynamic (repeat) for. You will then need to select the attributes, of that element, which you would like to have represented in your table. By default, Ecrion Omni System, will select all of the attributed associated with the selected element.
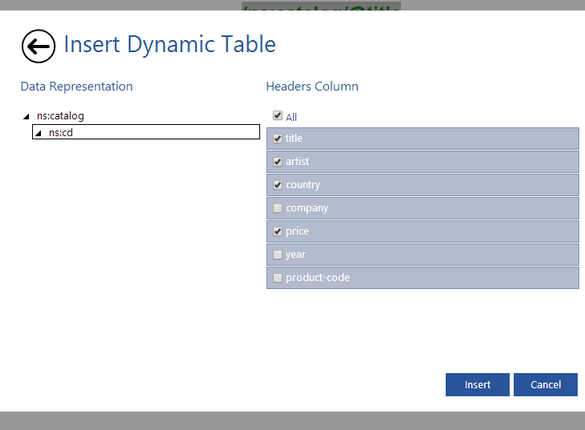
Figure 5: The repeating element ns:cd has been selected, and the desired attributes were selected.
4. Once you have made all of the selections for your dynamic table select Insert and your table will be inserted into your template.
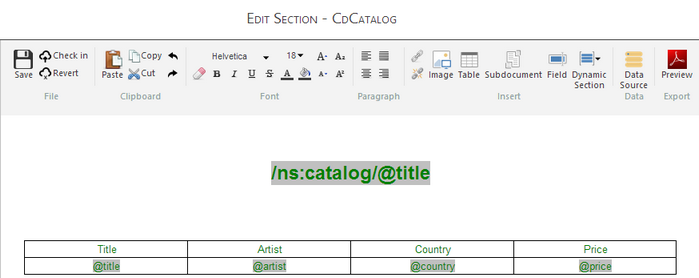
Figure 6: The dynamic table has been inserted with the corresponding headers and dynamic content.
Table Options
After you have your tables inserted, you have a few right click options.
| • | By right clicking in a static table row ( either of a static table or the header of a dynamic table ) you have the options to cut, copy, or paste content, as well as insert or delete columns and rows. |
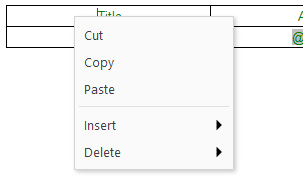
Figure 7: Contextual menu for static right click options.
| • | By right clicking in a dynamic (repeating) row you will have all of the options from above as well as, the ability to edit the field, and edit what the row is repeating for. |
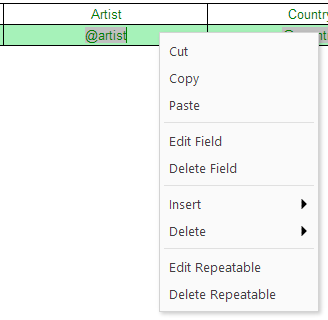
Figure 8: Contextual menu for dynamic right click options.