|
Working With Borders |


|
|
Working With Borders |
|
There are a few ways in the Publisher that you can modify the borders of your tables.
Use the Ribbon to Work With Borders
1. In the Design Surface, select the cell you wish to apply borders to. You can select multiple in a sequence by selecting the first cell, holding down the shift key, and then selecting the last cell in the sequence. The applied borders will be added to all selected cells.

Figure 1: A table with no formatting is located in the Design Surface.
2. Once your selection is made, navigate to the Design Tab in the Ribbon and locate the Borders Group.

Figure 2: The Borders Group provides options to add borders to cells or highlighted rows.
3. Select the Pen Color in which you would like your borders drawn by using the drop down menu for color selection.
4. Select the Width by specifying a value and dimension you would like to use. You can use the up and down arrows to modify or manually type the value.
5. Select the Borders menu button and select where you would like your borders applied to your selected cells in the Design Surface.
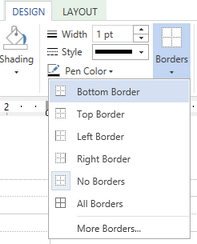
Figure 3: The Bottom border option is selected to apply borders to bottom of selected cells.
6. You will notice in the Design Surface, that the borders are applied as specified. In Figure 4, the borders were applied to the entire row because all of the cells in the row were selected originally.

Figure 4: A bottom border is added to all selected cells in the table.
Using the Properties Pane to Work With Borders
1. Enable the Properties Pane from the View Tab by selecting Properties.
2. In the Properties Pane, select the item you wish to modify in the Navigation Bar. Here you can select an individual cell that your cursor resides in or an entire table row relative to where your cursor is. The properties you modify will be applied to your selected item.
3. In the Border Group, you will first need to specify a desired color to apply, select the thickness of the border,and select the style of the border.
4. Once you have made your border specifications, you need to select the border application you would like to add. You will notice the table will update in the Design Surface to reflect any changes that are made.
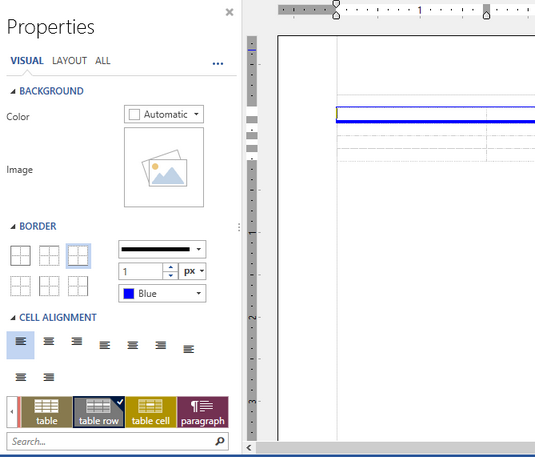
Figure 5: The Border is displayed in the Properties Pane as well as in the Design Surface on the table.