|
Conditionally Changing the Background Color of a Cell |


|
To conditionally change the background color of a table cell based upon a test on your data source, use the following instructions.
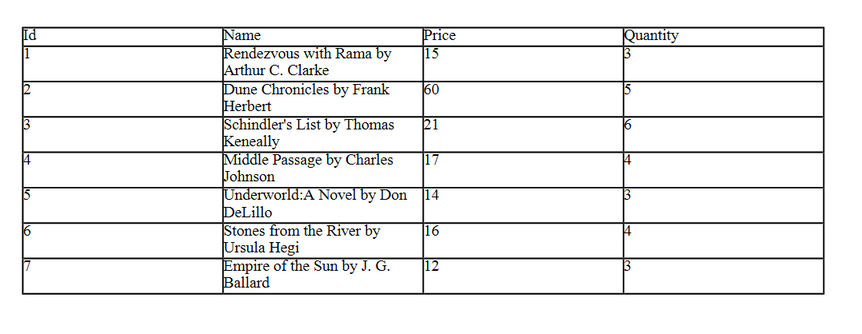
Before you begin understand your data and your current table and its output. In this example, we have a simple table repeating for every "Product" element in the data source. As seen in Figure 1, all values are displayed in our output with no formatting.

Figure 1: The original table outputs all information.
1. Open the Properties Pane by selecting Properties in the View Tab, located in the Ribbon.
2. Select the item to apply Conditional Formatting to in the Navigation Bar. For this example, we will select the Table Cell.
3. Select the All Menu located at the top of the pane and select the Dynamic Value button next to the background color.
4. In the Dynamic Property Dialog select the Add Rule button.
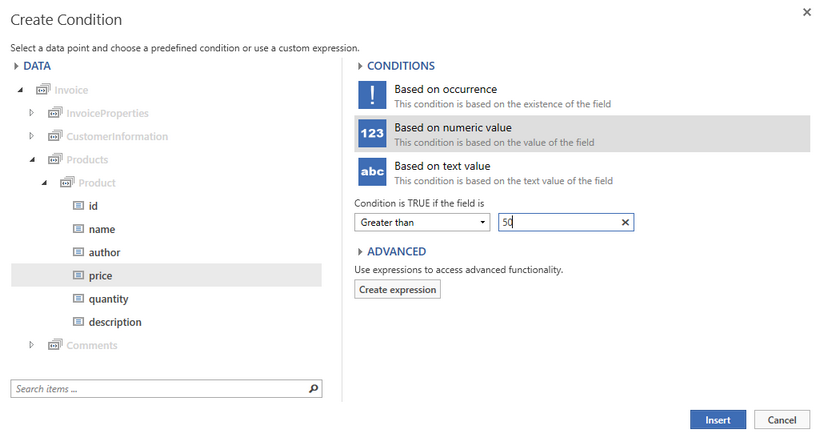
5. In the Create Condition Dialog, you will need to specify your condition for when the table row will not be shown.
a. Select in the Data Tree the data value to base your condition on.
b. Then, choose your type of condition based on available options for based on occurrence, numerical value, or text value.
c. Then specify the details of your condition for contains or starts with using the drop down menu available and then add the value to test for. You can create more complex conditions manually by selecting the Create Expression button. When you are finished configuring your condition, select Save.

Figure 2: The condition is created in the Create Condition Dialog.
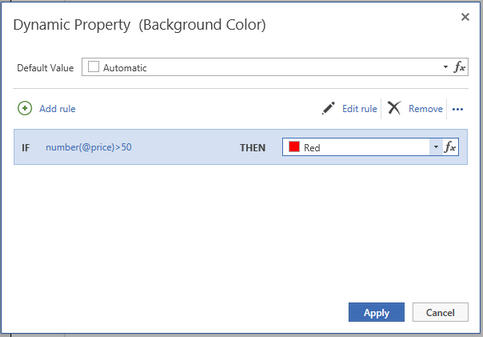
7. You are returned to the Dynamic Property Dialog where you will need to specify the value to use when the condition is met. Here we will use the static value drop down menu to select which value we wish to apply to this property when the condition is met. In this example, we want to highlight our table cell with a background color of red when our condition is met. You should be aware you can change this value to be dynamic from your data source by selecting the Dynamic Value button.

Figure 3: The value of the property is specified for when the condition is met.
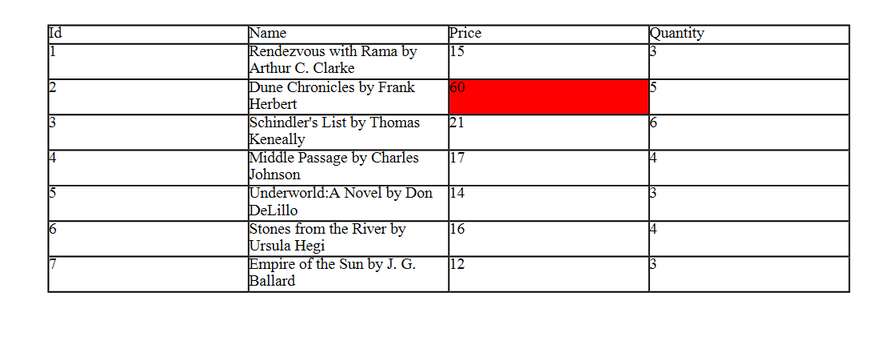
8. It is now time to preview your output to test the behavior of your conditional formatting. Notice in Figure 5 that the table is displayed for every "Product" element, but when the price value is greater than fifty, the background color of that specific table cell is changed to red.

Figure 4: The output reveals that for any price value greater than fifty, the background color of the table cell is changed to red.