|
Installing BI Data Analyst |


|
|
Installing BI Data Analyst |
|
Ecrion BI Data Analyst is available to you to in an executable (.exe) installer which contains several applications called the Ecrion BI Developer Studio. This allows you to simply double click on the installer file and follow the on screen instructions provided to you by the Setup Wizard. Below are some helpful points to assist you along the way with installation.
You should first ensure you have installed all System Requirements before moving forward with the BI Developer Studio installation.
Setup Steps
1. First, you will notice the welcome screen to indicate the setup wizard is ready to begin and guide your though the installation. When you are ready to begin, select Next.
2. Next, make sure you accept the end-user licensing agreement by checking the box and select Next.
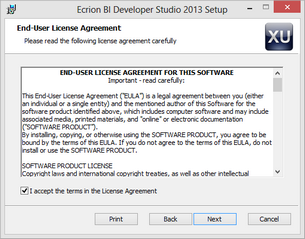
Figure 1: Ecrion end-user agreement
3. You will need to specify the directory you wish to install Ecrion BI Developer Studio in. Ecrion recommends using the default installation folder as listed in the image below. When you are ready to move to the next step, select Next.

Figure 2: Specify the directory to install BI Developer Studio
4. You will now need to select the MS SQL instance (if multiple) to be used with BI Developer Studio, then select Install. This optional step will be displayed only if the sample database is installed.
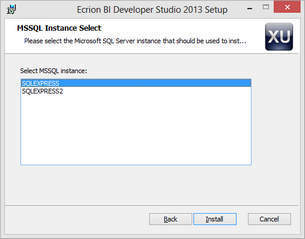
Figure 3: Select the desired SQL instance to use
4. The Setup Wizard will now perform the necessary installation and provide a progress window for your information.

Figure 4: Status progress bar for installation
5. When the setup is successfully completed, the Setup Wizard will provide the following notification of completion. You can uncheck the "View Readme file" option if you do not wish to launch the Readme information file. When you are ready to complete the installation, select Finish.
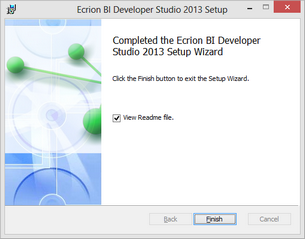
Figure 5: Successful completion of installation