|
How to Insert a Slider Filter |


|
1. Navigate to the Insert Tab in the ribbon.
2. Select the Slider button from the Filter group.

Figure 1: The Slider button highlighted in the Filter group.
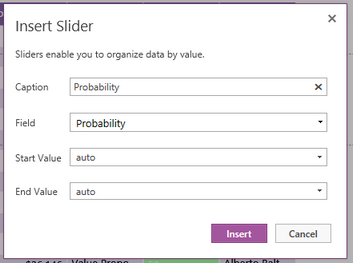
3. Give your Slider a caption to give your dashboard users a clear understanding of the data that will populate the Slider.
4. From the drop down menu select the field that you would like to populate this Slider. If no Caption is added before this field is selected, the Caption will automatically populate with the Field name.
5. You have a option to select a Start and End Values for your Slider. The options you have to select from will be populated from your database. If you choose to leave this as auto the filter will use the first and last value from your database.

Figure 2: The Insert Slider dialog with options configured.
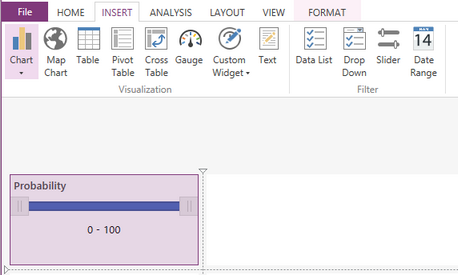
6. Once you have set up the Slider Filter as desired, you will simply need to select Insert and the list will appear in the Design Surface.

Figure 3: The resulting filter in the design surface.
Next Steps
Slider Properties - This section explains several important Slider Filter properties.
Include or Exclude Widgets - Learn how to exclude widgets from your dashboard without deleting it all together.
Resizing Widgets - Learn how to resize your widgets in the design surface.
Repositioning Widgets - Lean how to reposition your widgets after inserting into the design surface.