|
Connecting to an EOS Server |


|
To establish a connection to an EOS Server Instance, you will need to use the instructions below.
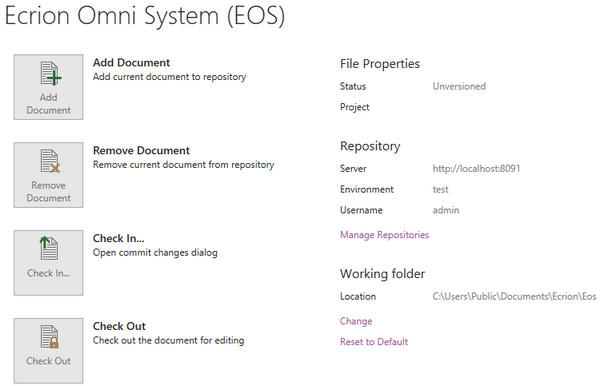
1. In the EOS Menu in the File Tab, select Manage Repositories available on the second column of the tab.

Figure 1: The Manage Repositories option is found in the Repository Group.
2. If you are connected to a repository already, you will see information on your present connection. To establish a new connection, select Connect.

Figure 2: The Manage Repositories Dialog displays no information because there is no established connection.
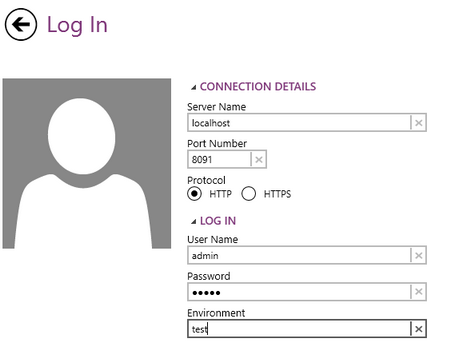
3. You will now need to specify the connection details including the Server Name for the EOS Instance, the Port Number, Protocol, and lastly your login credentials to EOS. This requires that you also know the Environment ID to connect to the repository. Once you have added all of the necessary configurations and credentials, select Save. You will notice a spinning indicator while the BI Architect communicates to your EOS Server.

Figure 3: The connection details are added.
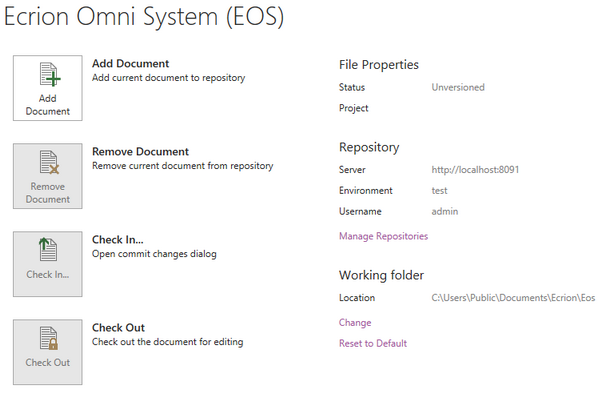
4. When a successful connection is established, you will be returned to the main EOS Menu in the File Tab. Now you will notice that your connection details are specified. If, for some reason, the connection fails to establish, you should revisit step three above to ensure your provided server name, port, and other details do not contain any syntax errors or omissions.

Figure 4: The current EOS connection is displayed in the Repository Group.